Design & Creative Development
awc_logo_2023_create_change.jpg

Create & Change

Posts in March
Day 85 - Cracking Up.

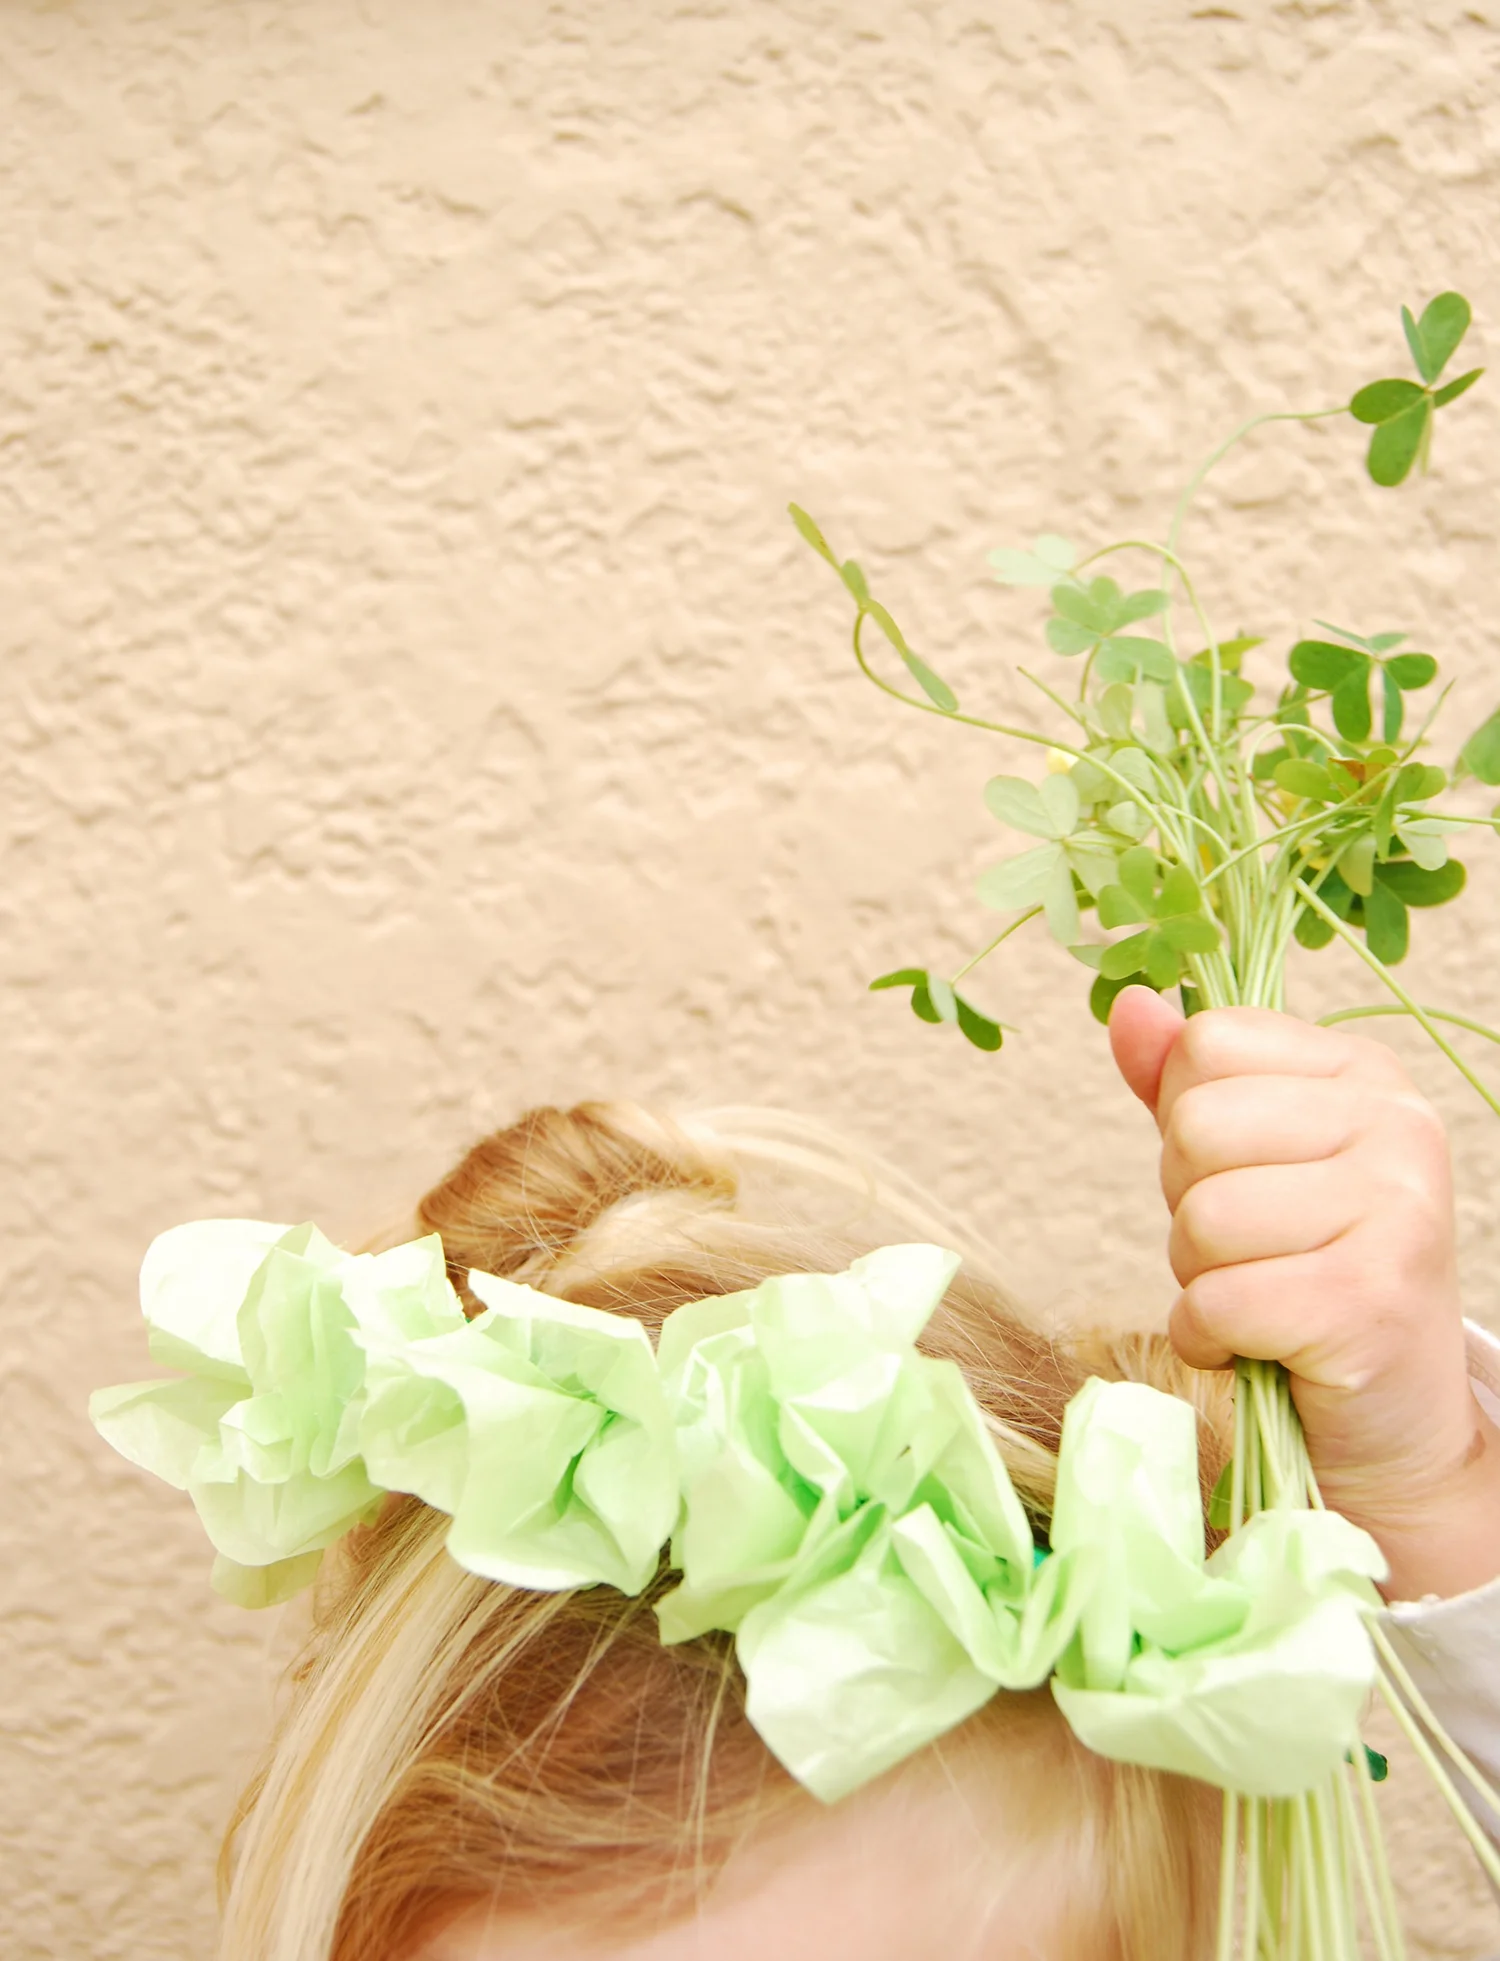
Day 85- Morning. Oh boy! This has been a week of failures. Good thing it's Friday. I'll have the weekend to steal lots of chocolate eggs from children's Easter baskets (notice I didn't say MY children) and hopefully emotionally eat my way to better creative posts for next week. I wouldn't call today's post a complete failure but I wouldn't call it an amazing success either. I would put it in the B movie category like "Sharknado." It's kind of charming but deep down inside we know it's a little sad.

Let me waste no time showing you this beast of a project. Please go ahead and try it and then report back. I'm sure you will be unsubscribing after trying this monster. Today's project is to make piñata joke eggs. Stay with me as I show you the exhausting steps for making this hell of a creative endeavor.  
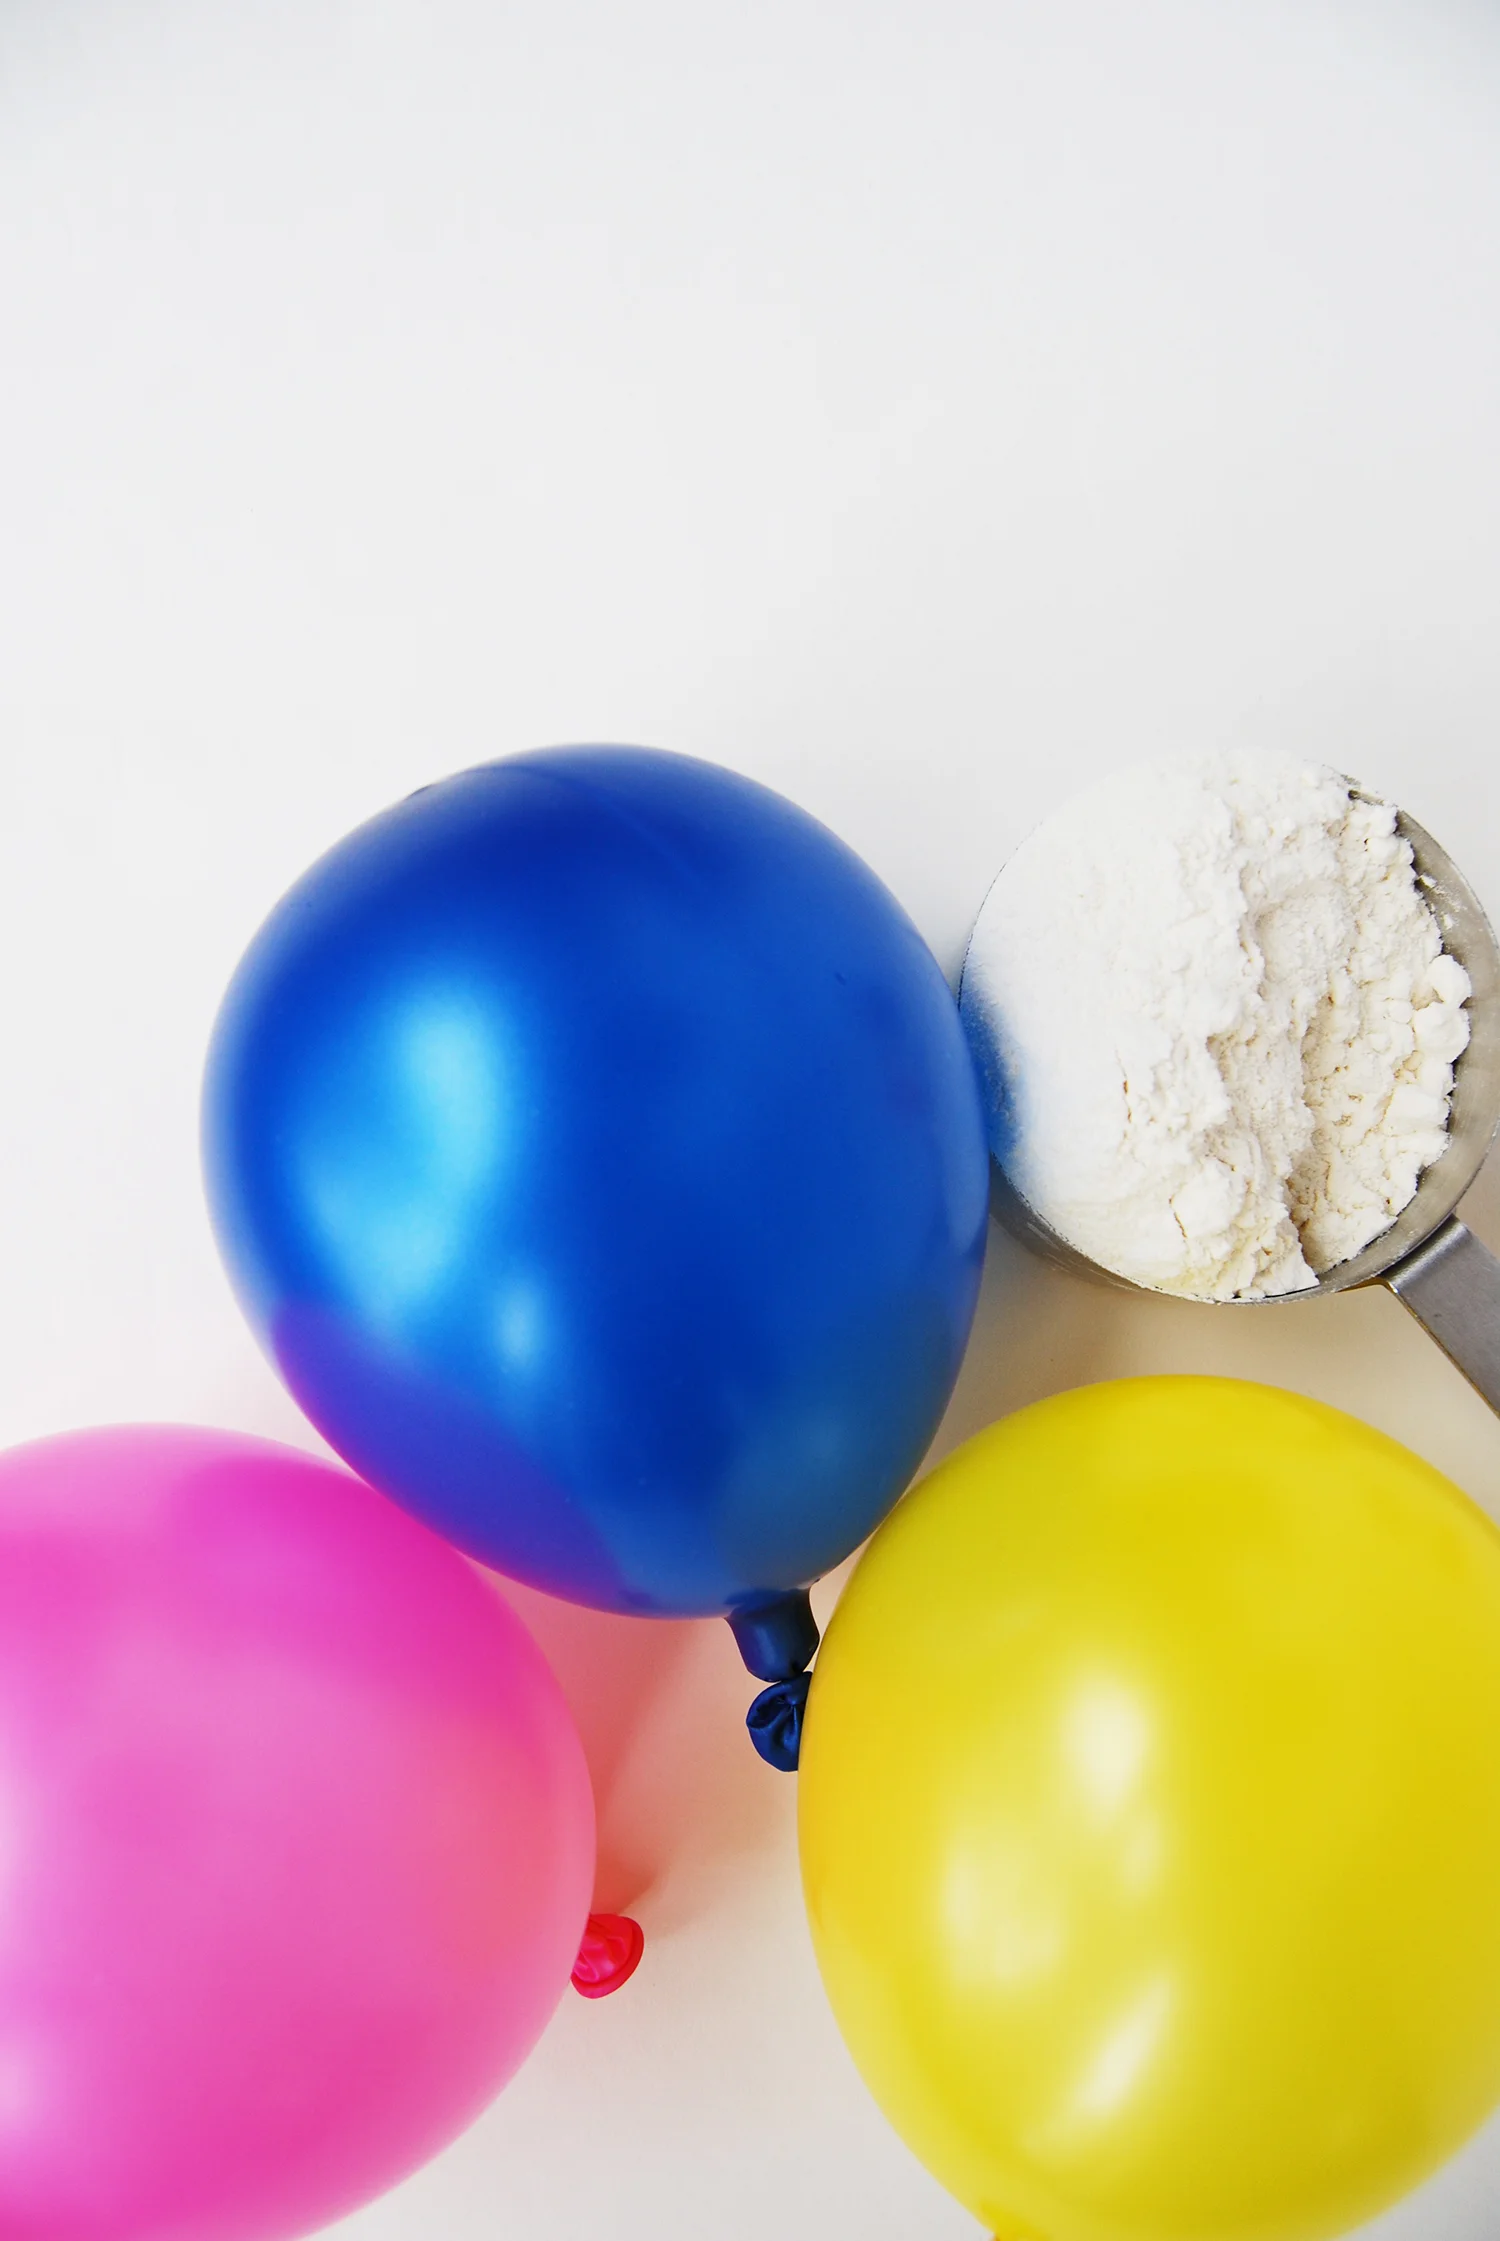
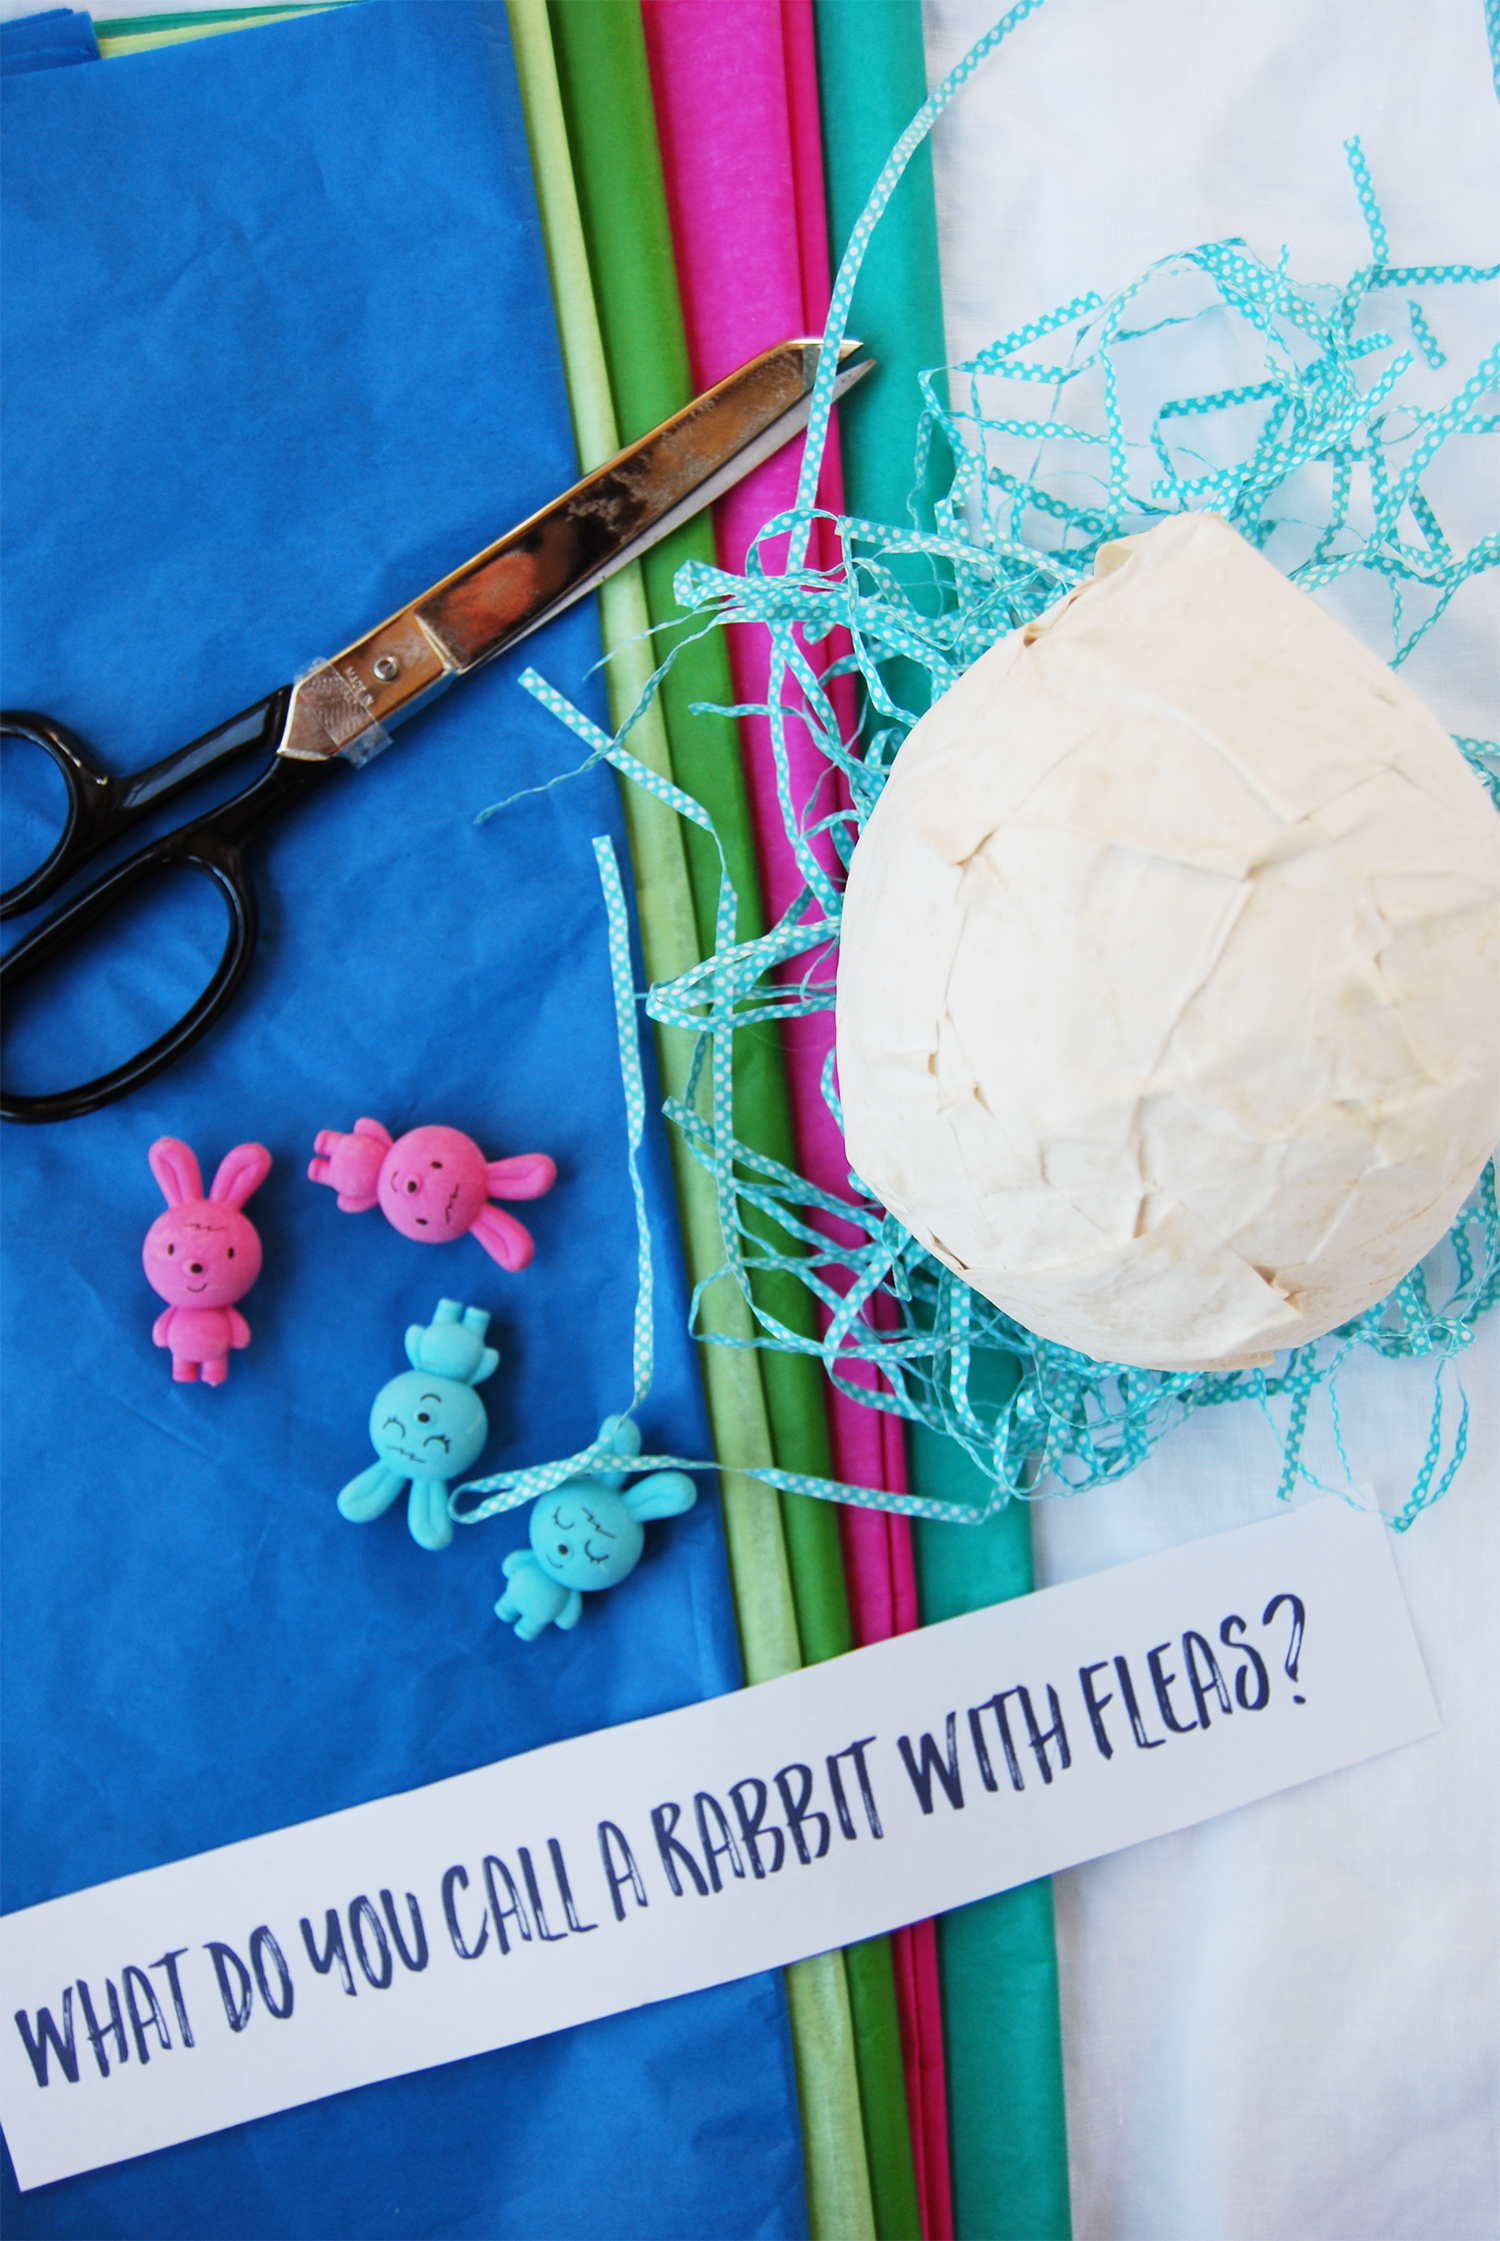
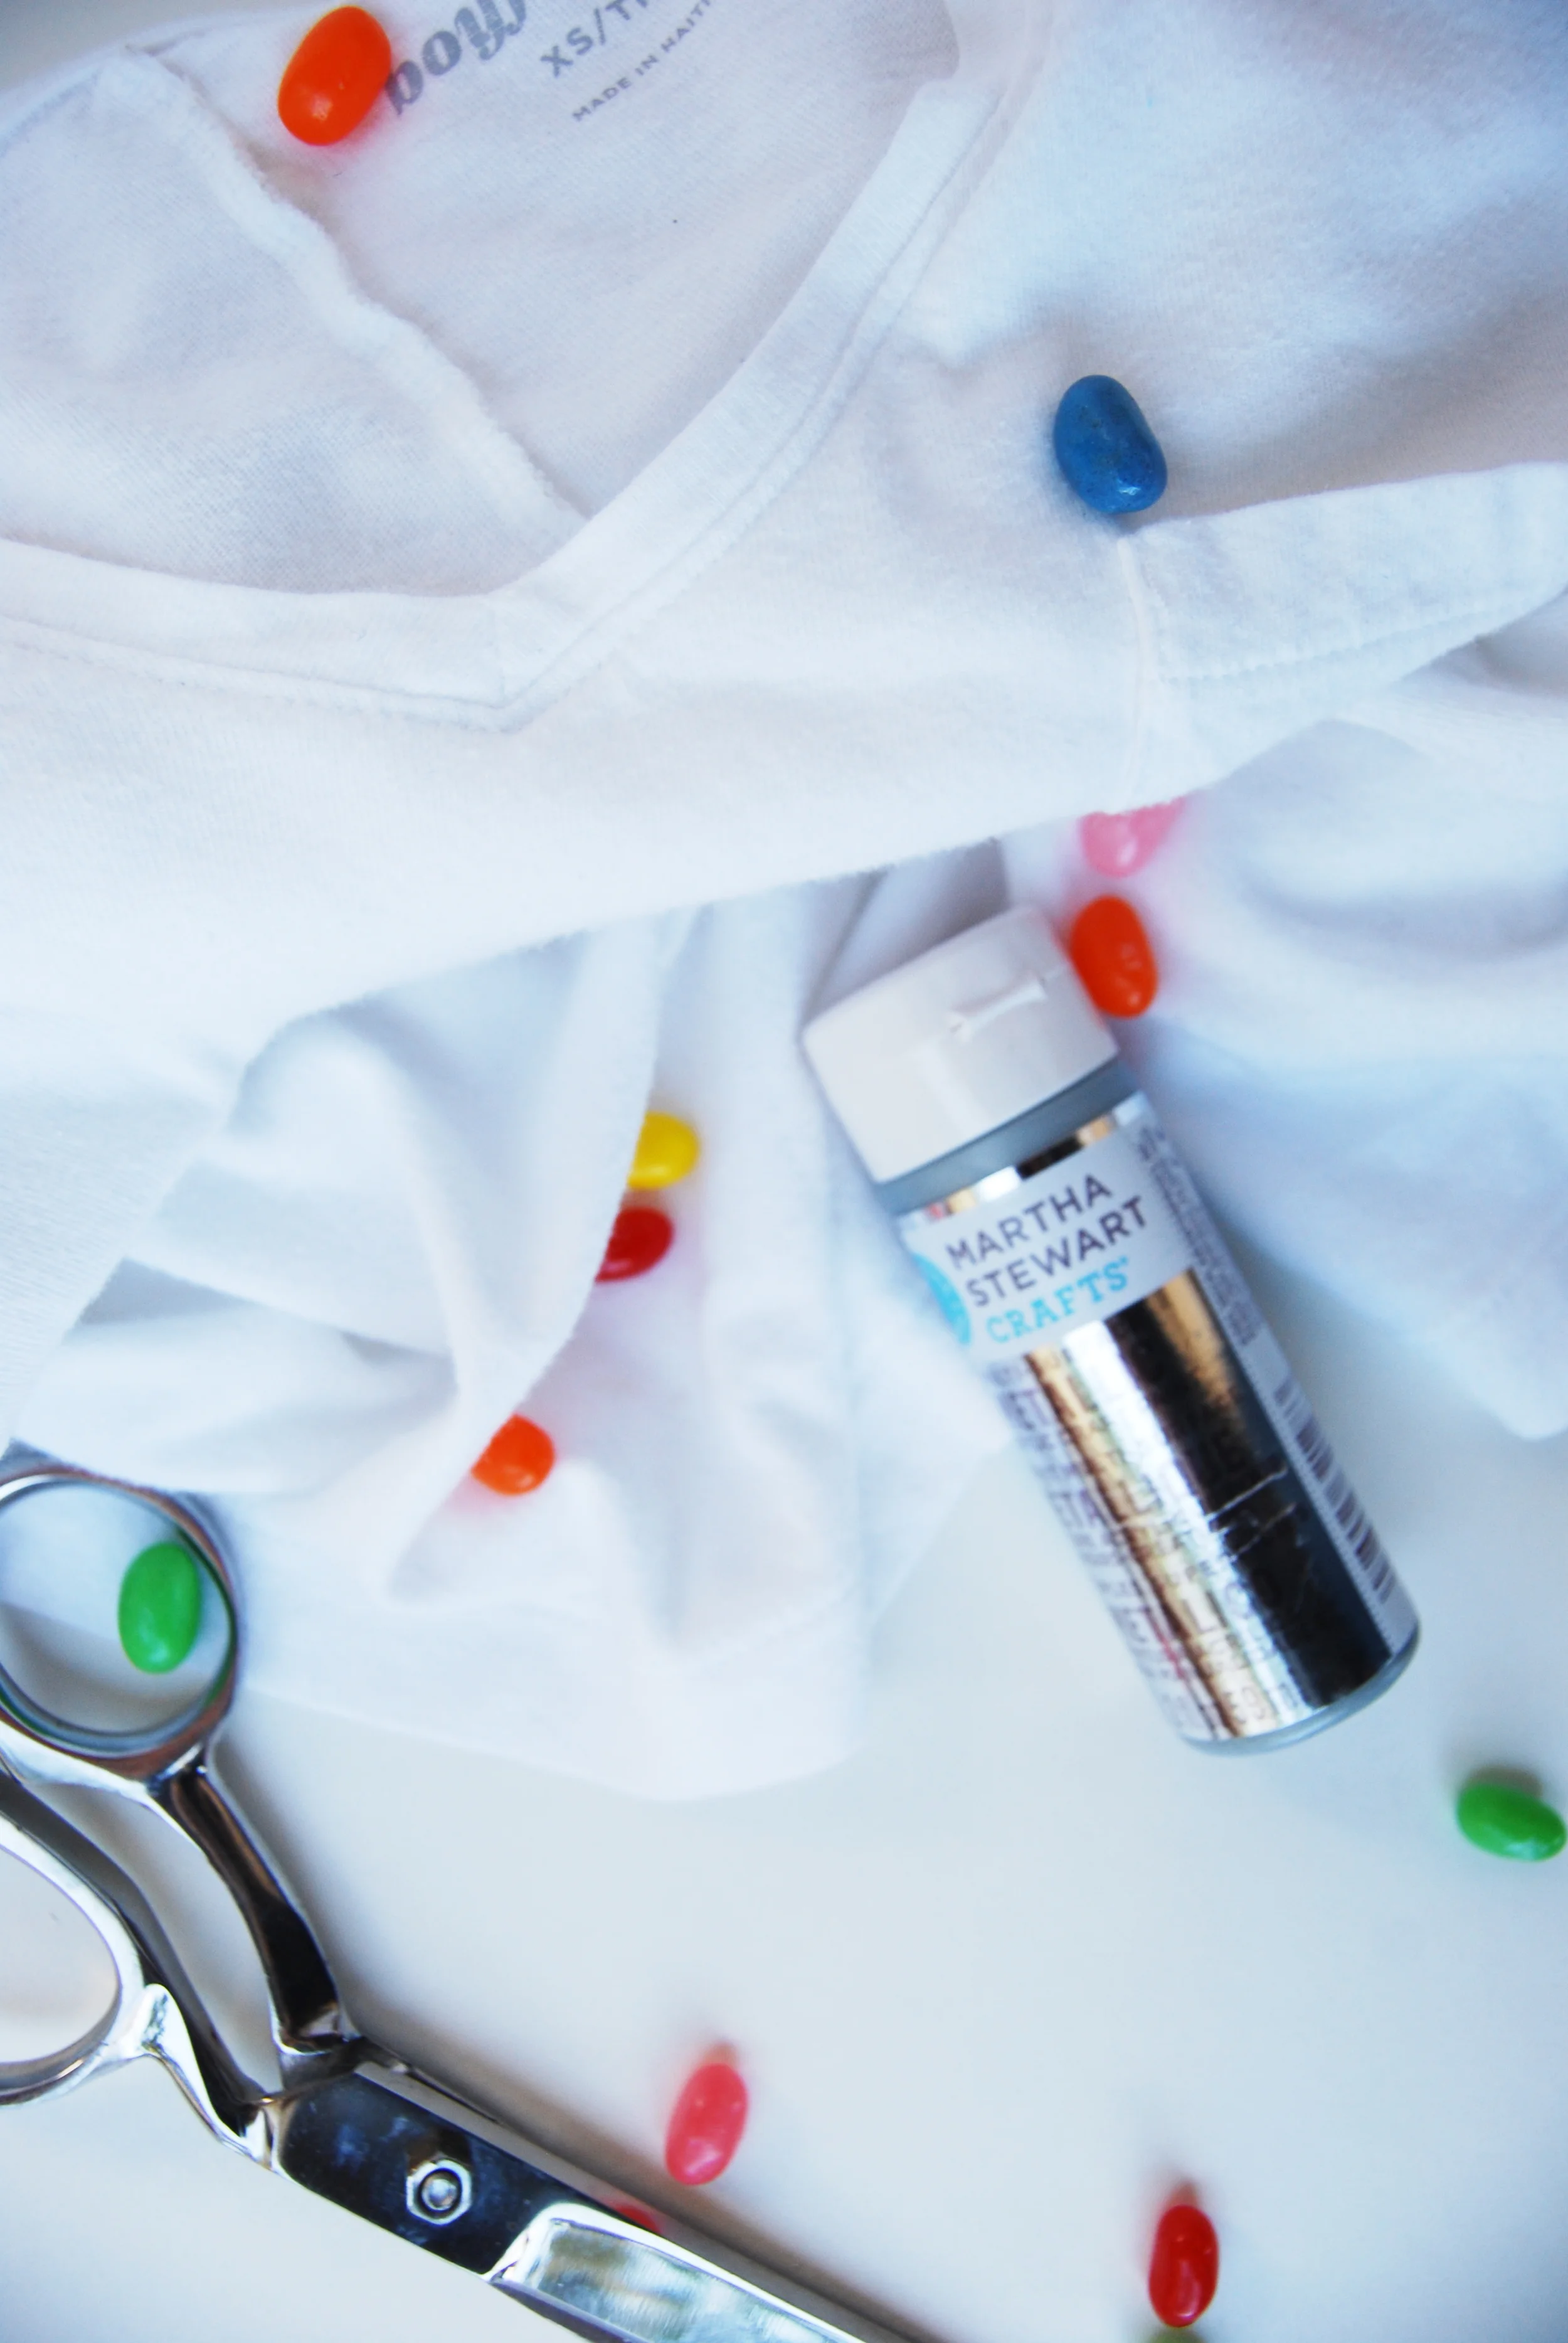
Items Needed

  • 3 small balloons
  • newspaper or newsprint
  • 1 cup flour 
  • 1 cup water  
  • 3 different colors of tissue paper
  • 3 printed jokes (easter jokes can be found at www.jokes4us.com)
  • glue 
  • scissors
  • easter basket grass
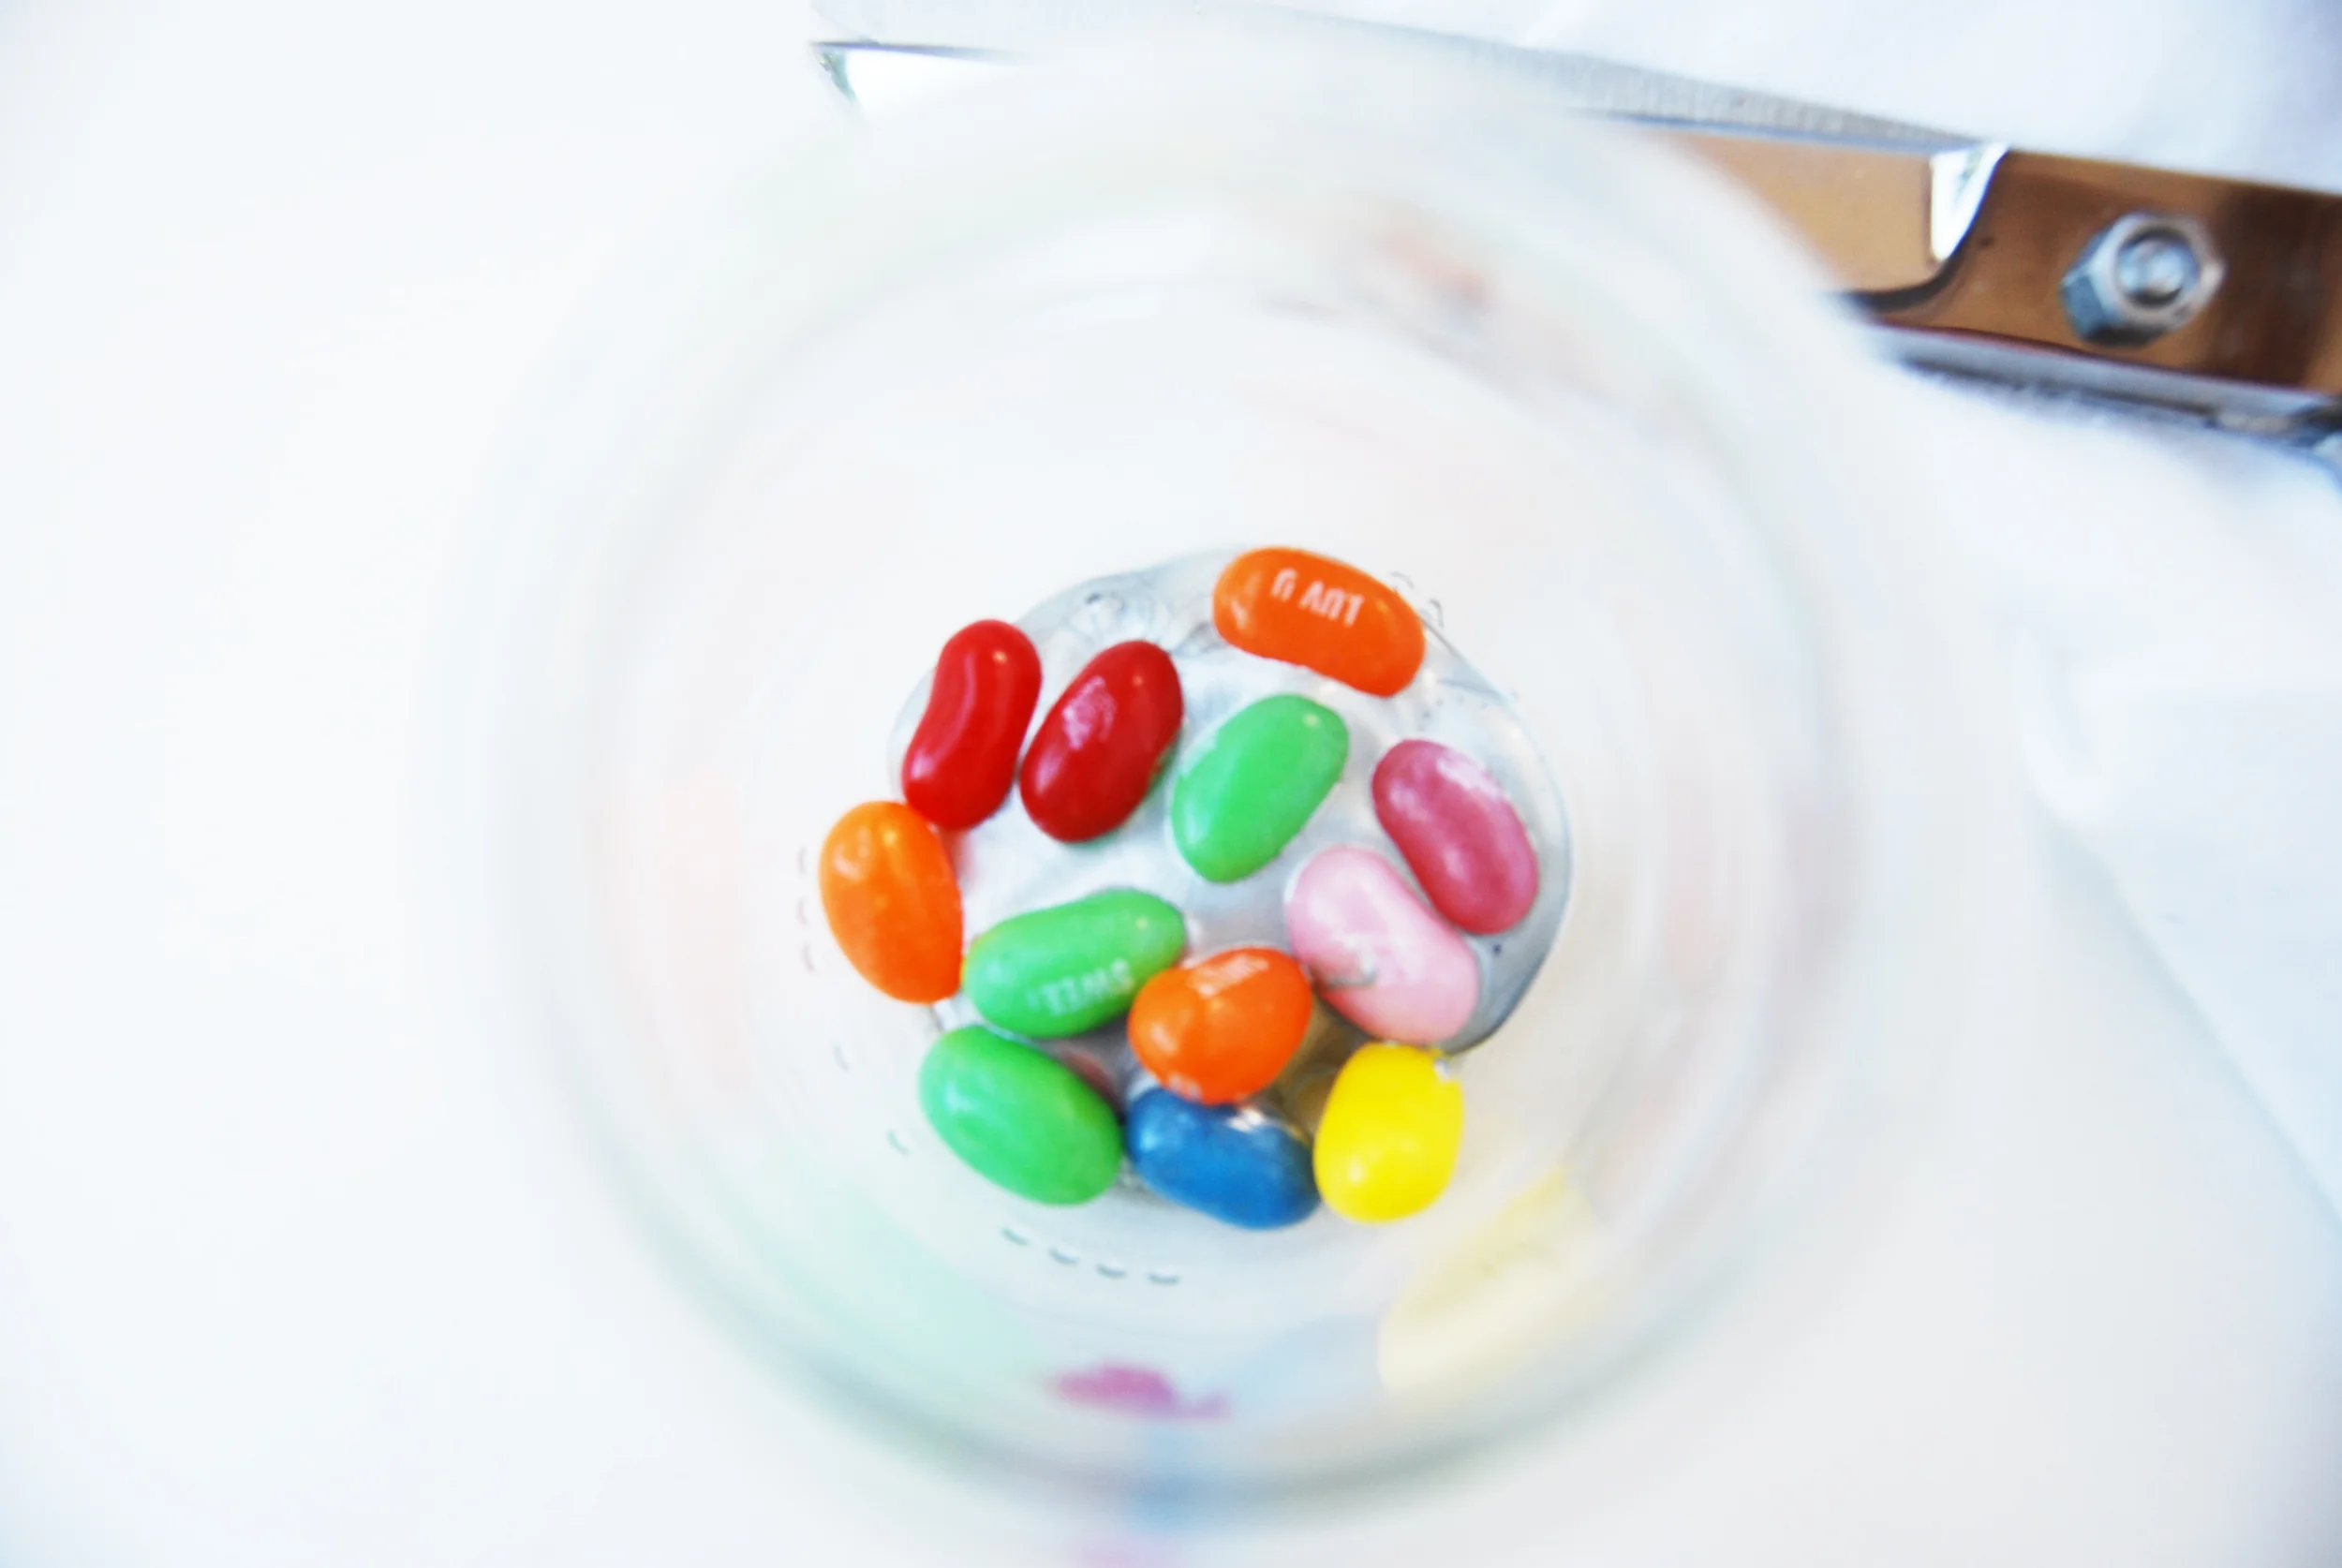
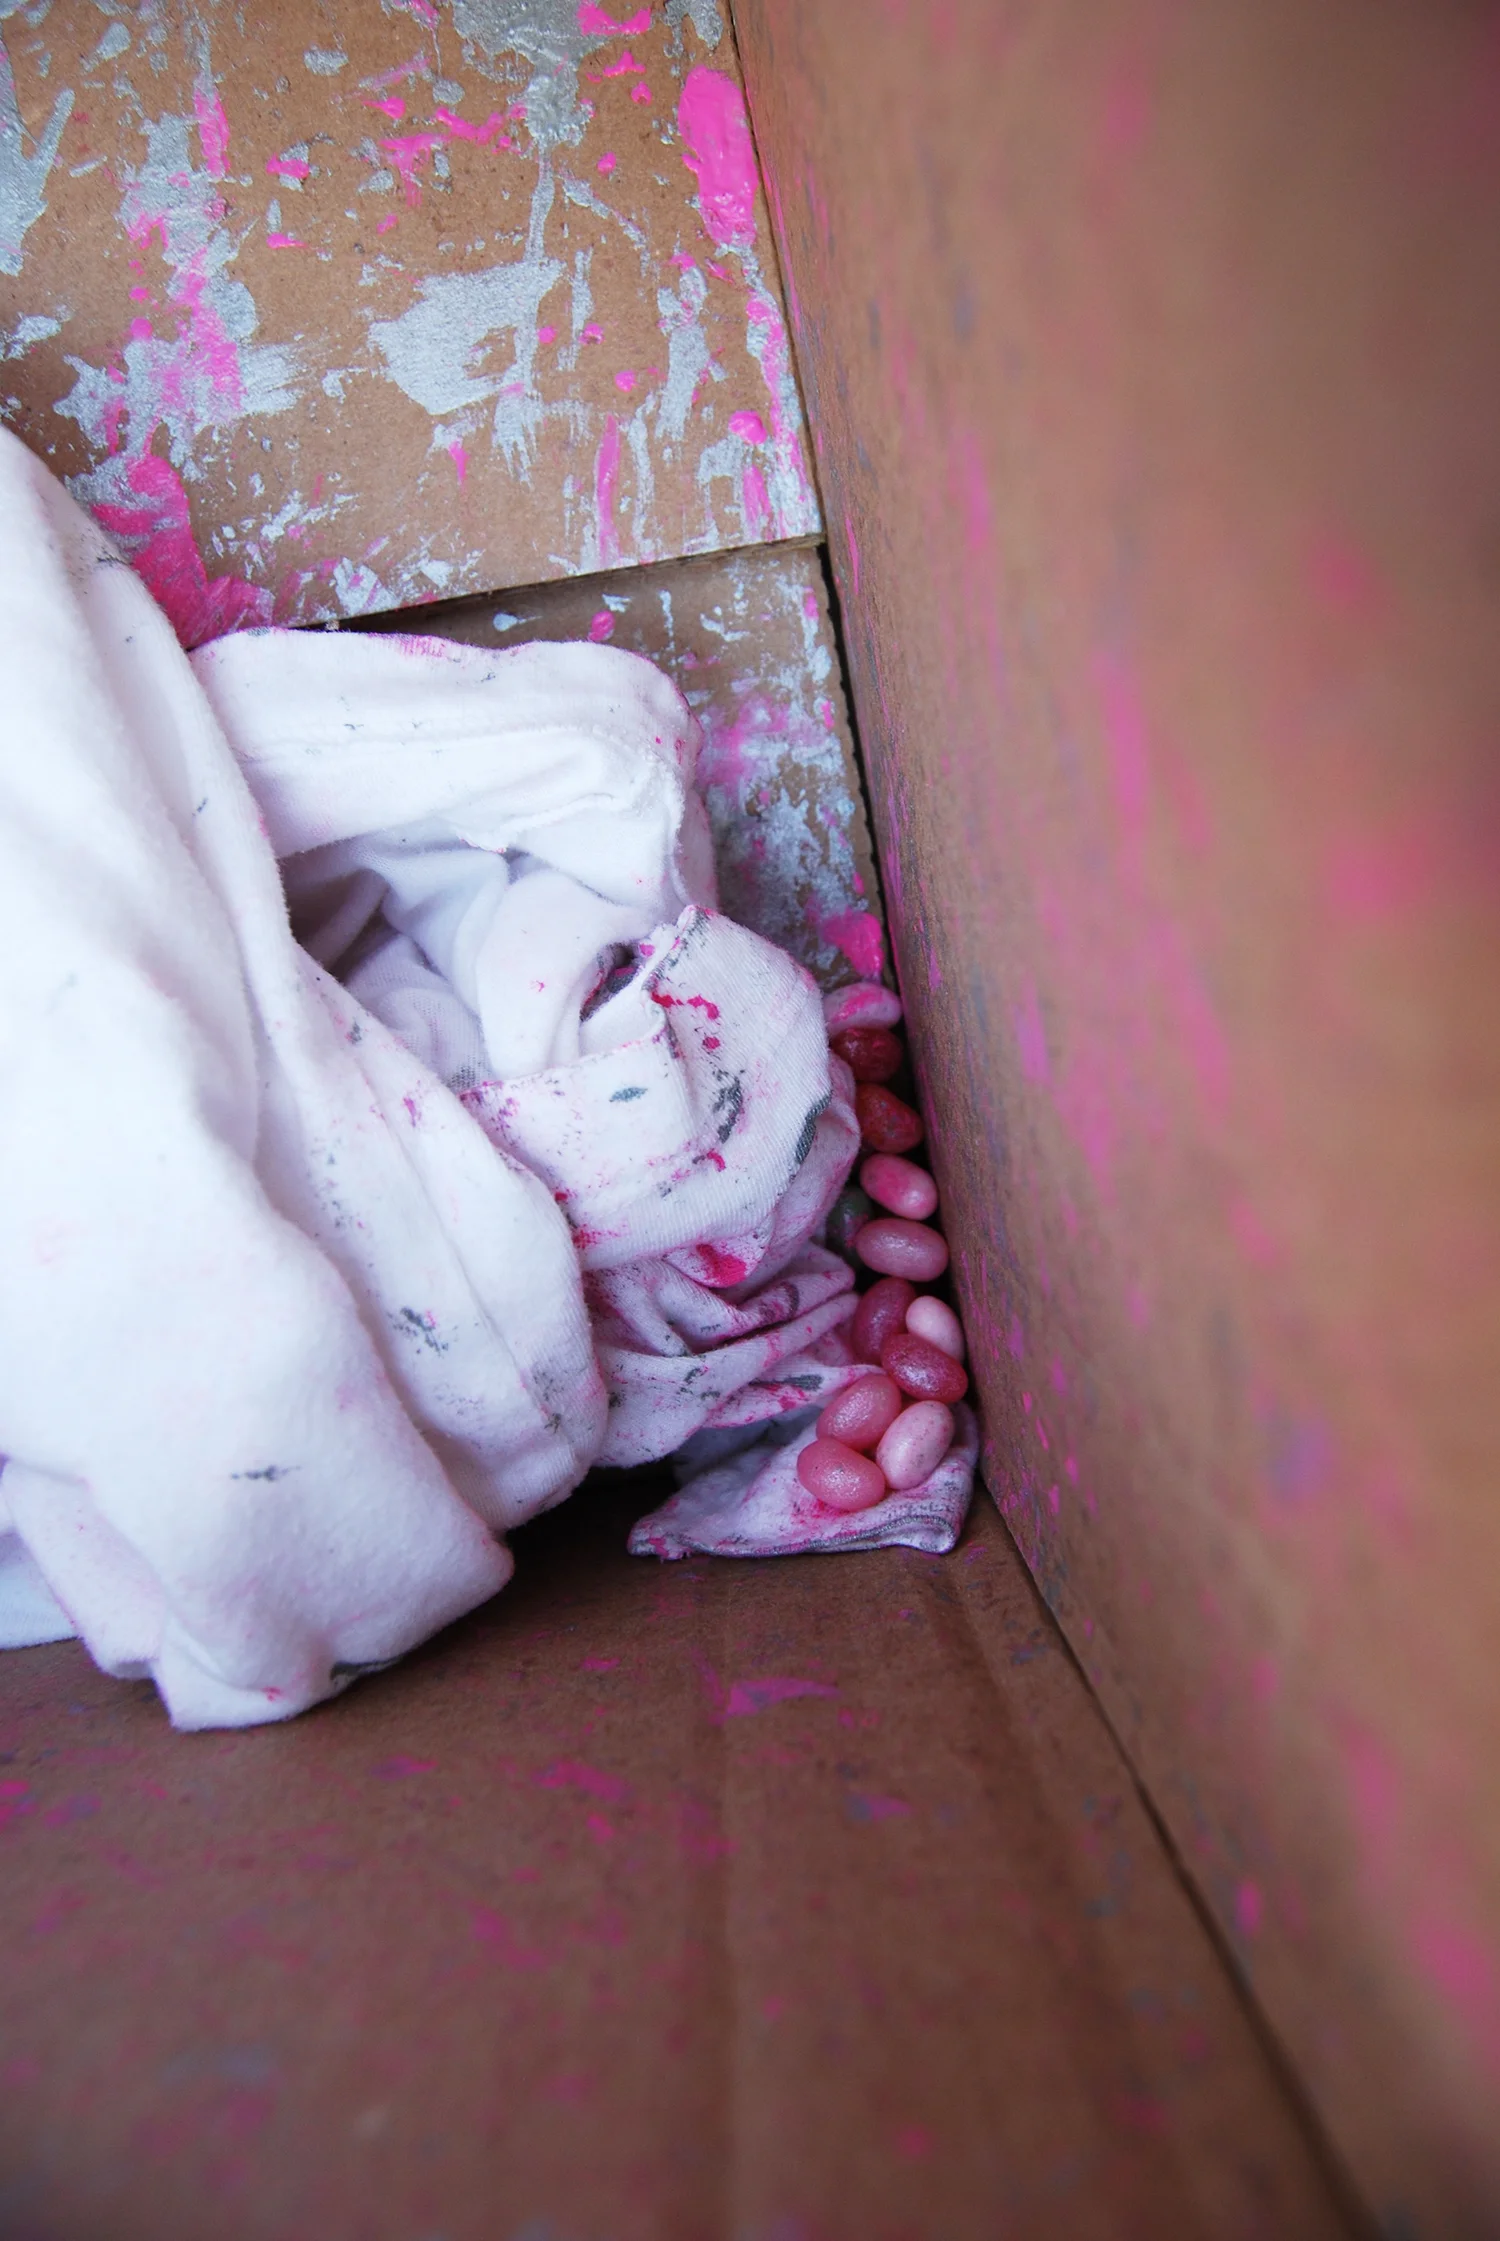
  • non-breakable doodas such as erasers, small markers & rubberballs

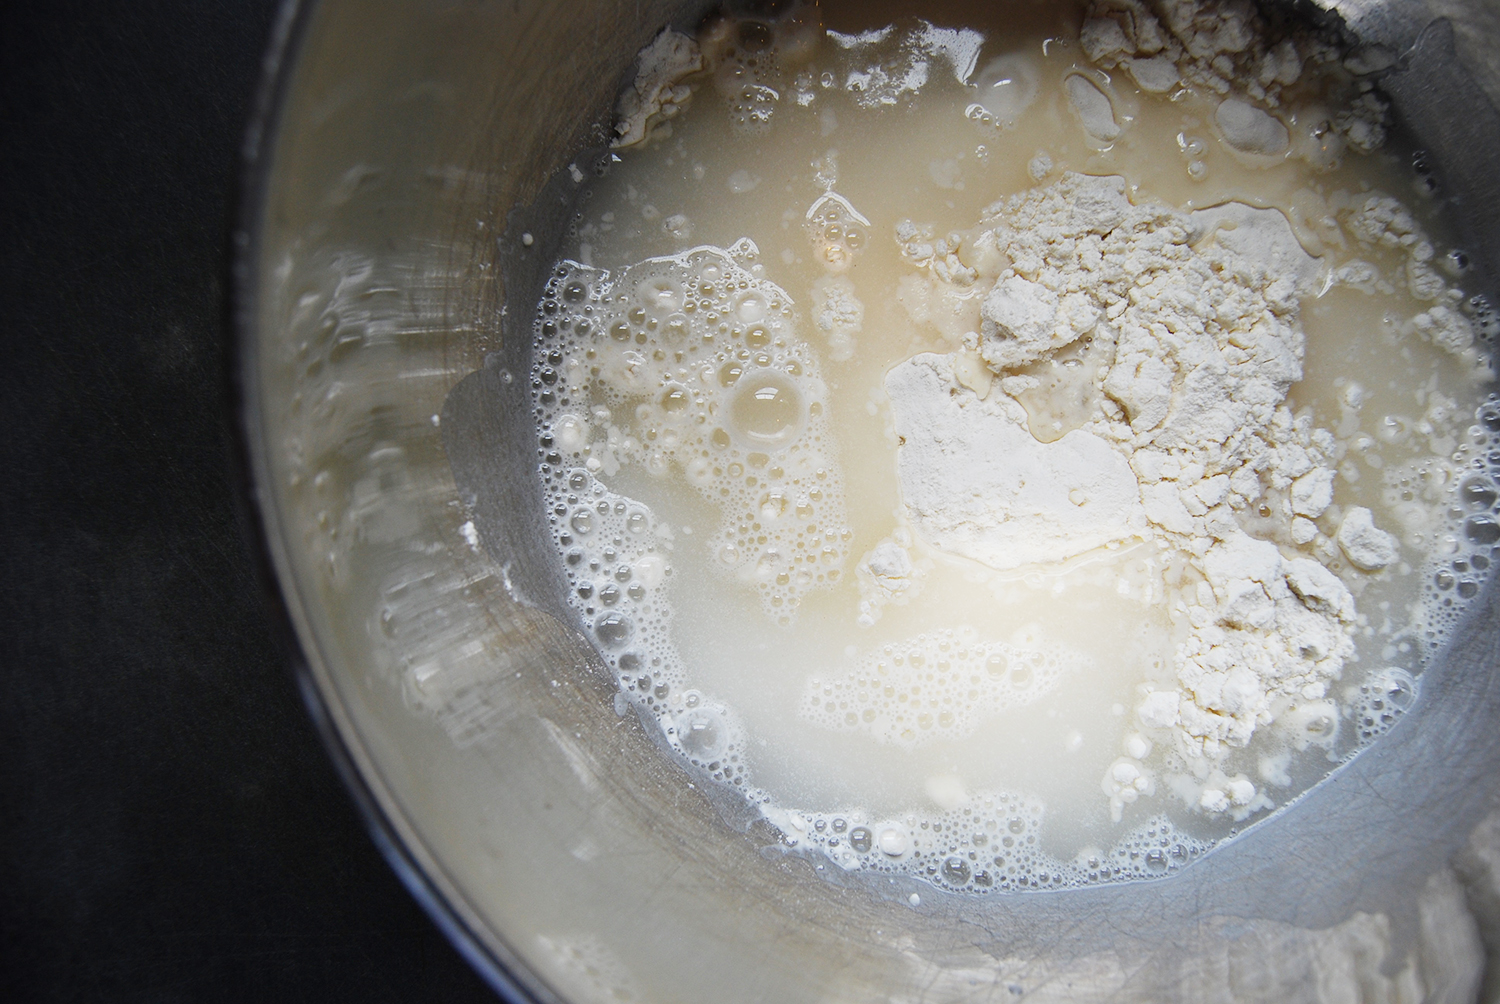
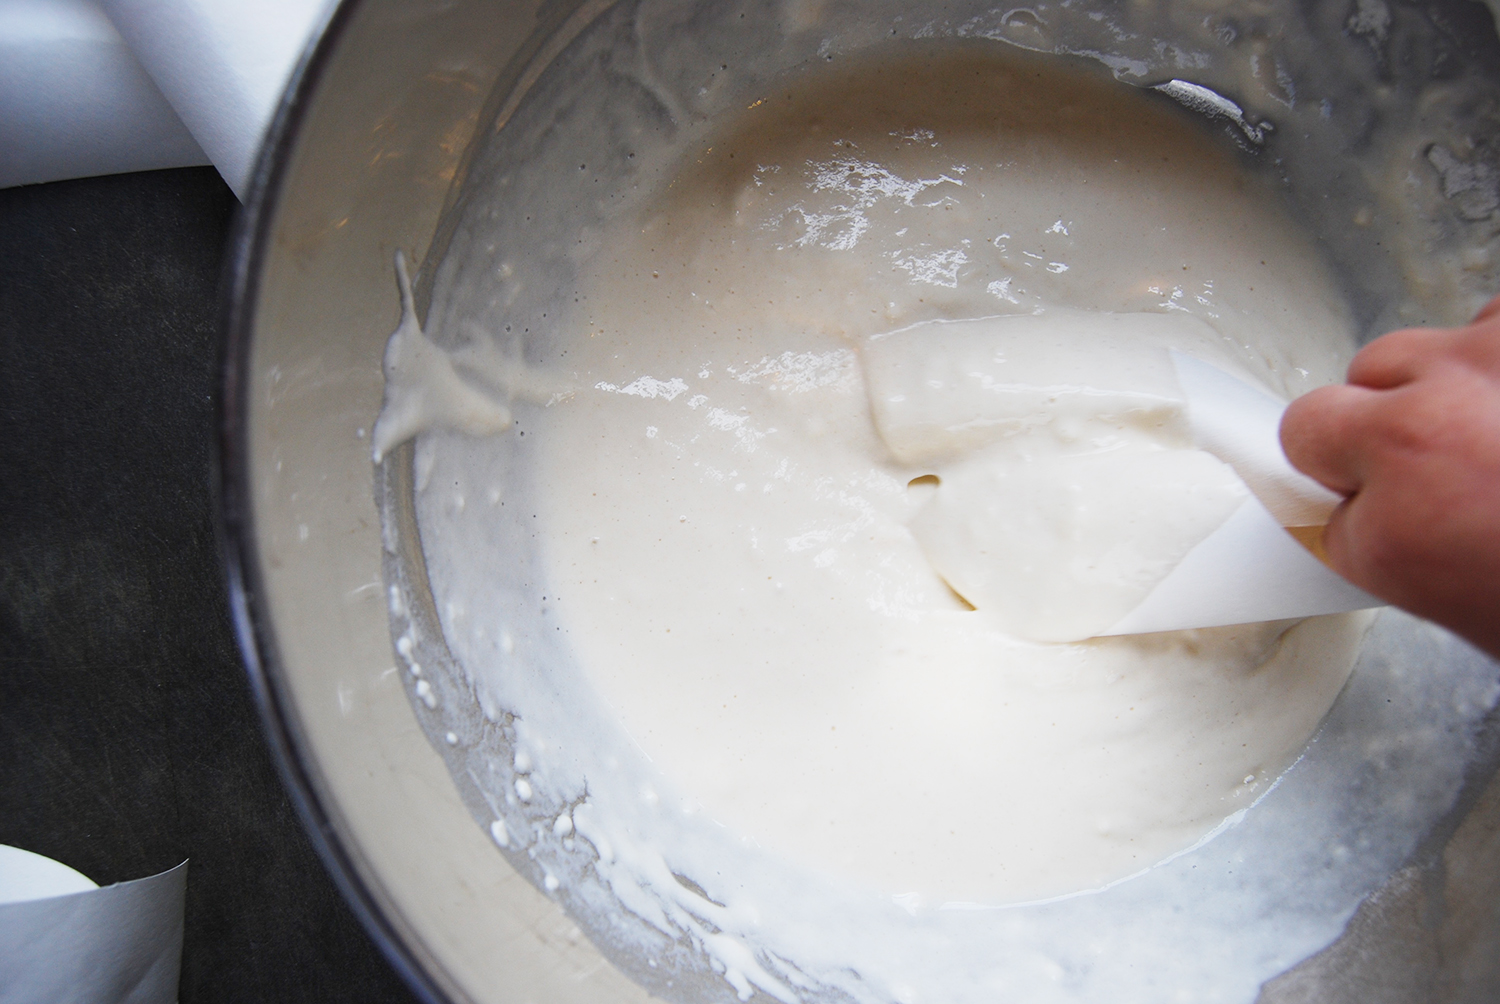
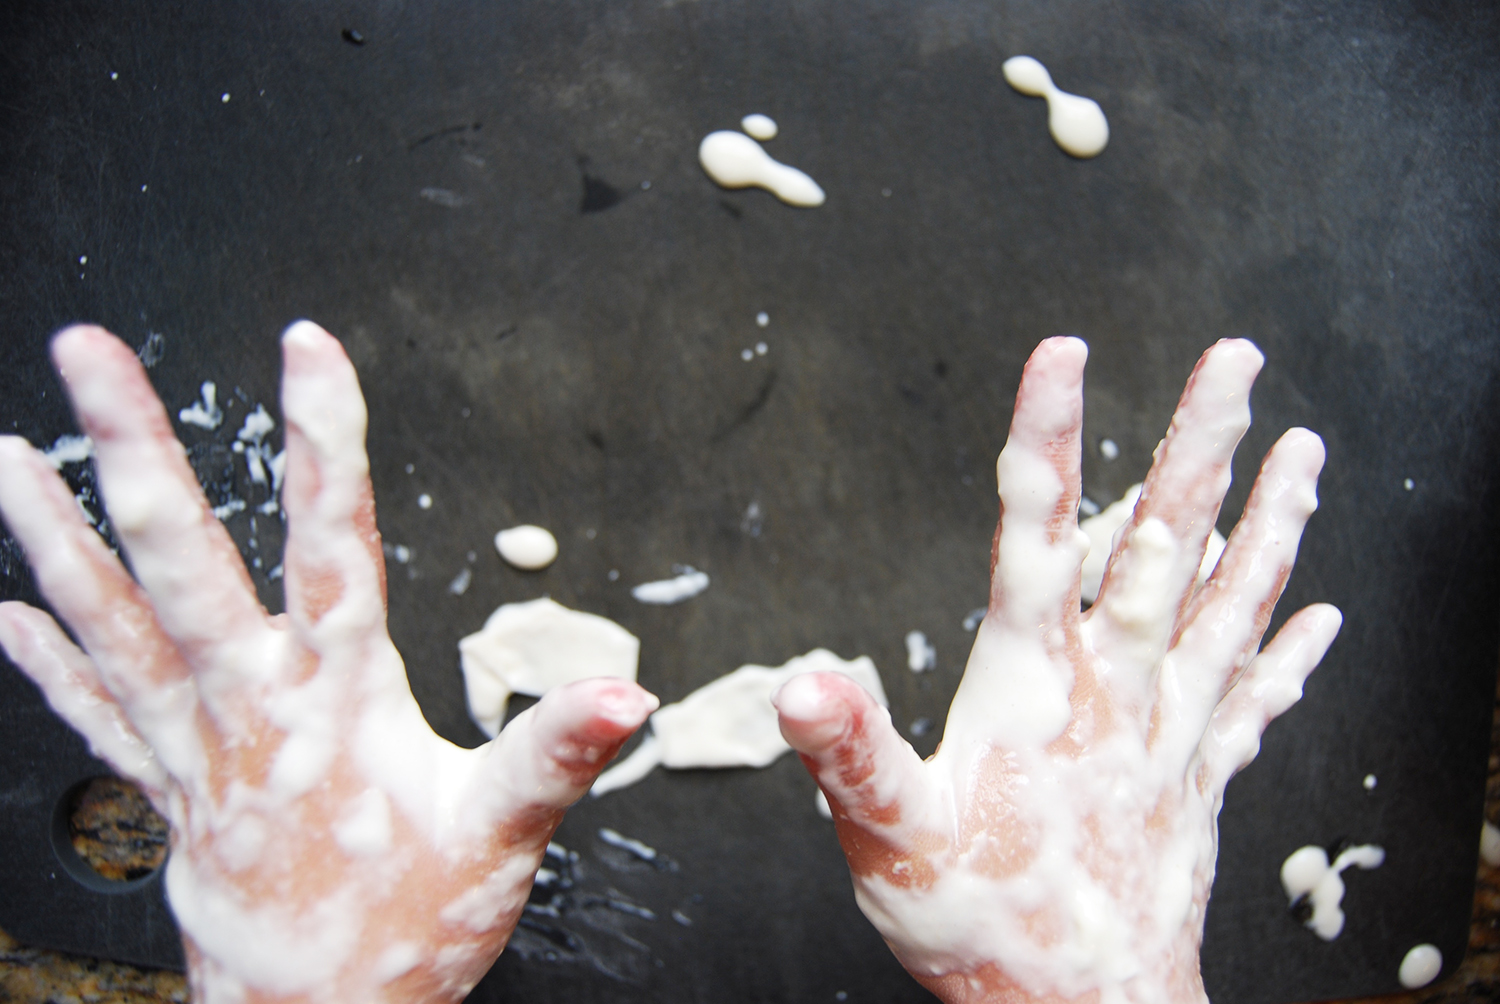
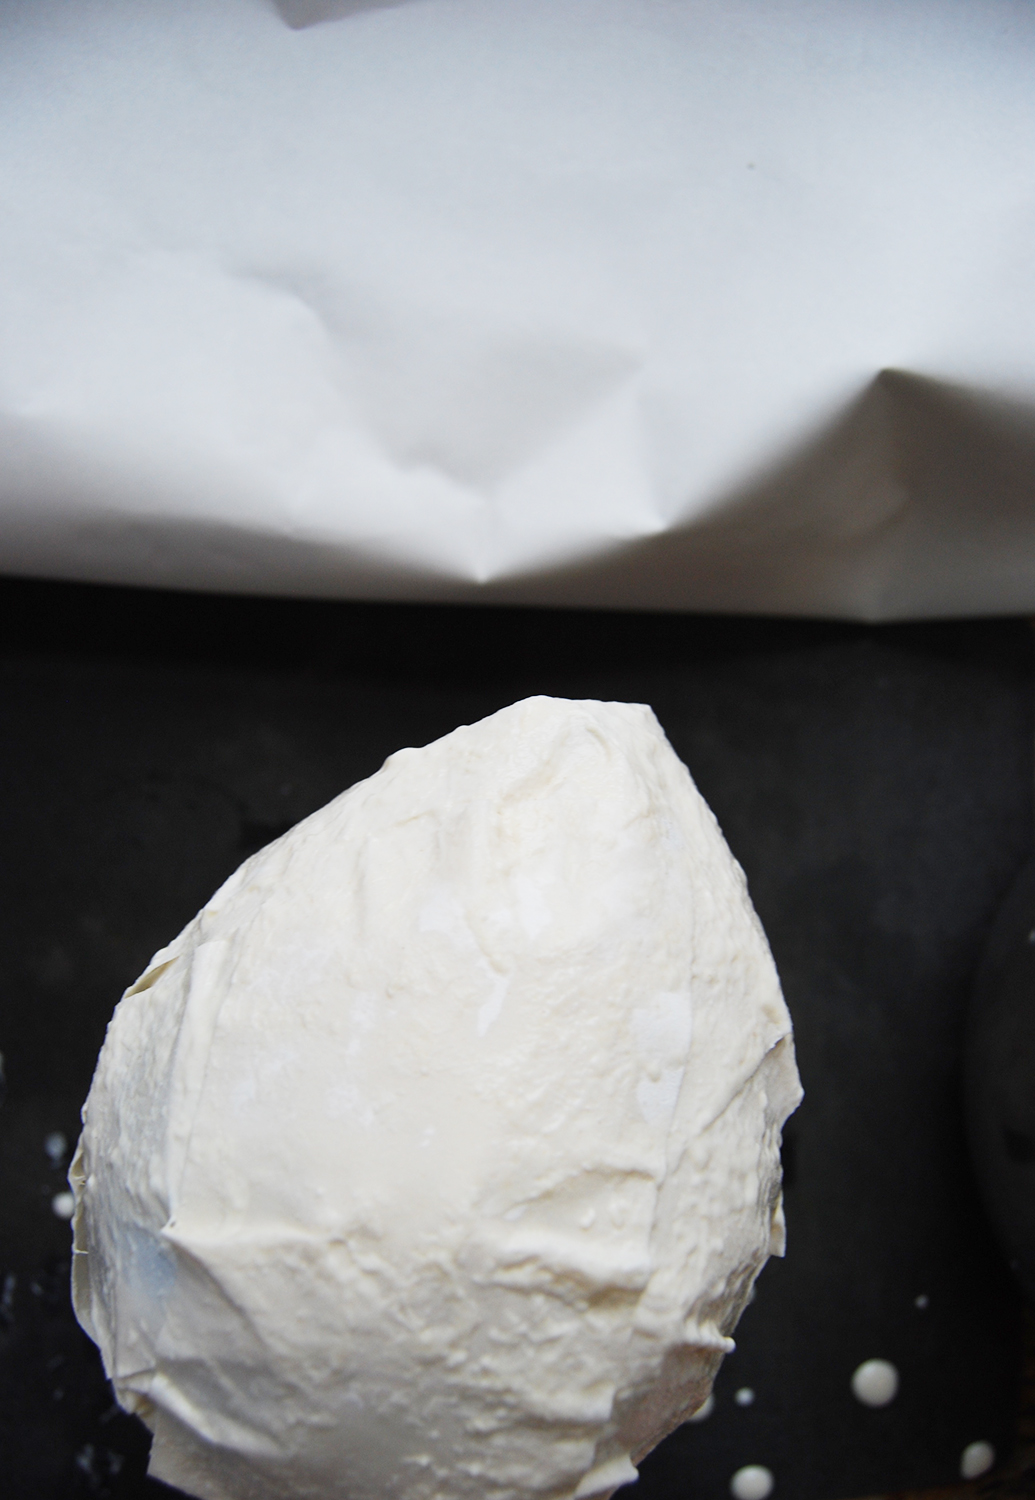
Step 1: Blow up the balloons but only half size. Place some newspaper down on a work surface. Mix together flour and water in a large bowl. Cut 2" long strips from the newspaper or newsprint. Now place the wet paper on the balloon. Layer and cover the ballon. Place the wet ballon on the work surface. Repeat for the other balloons. Let dry 24-48 hours.

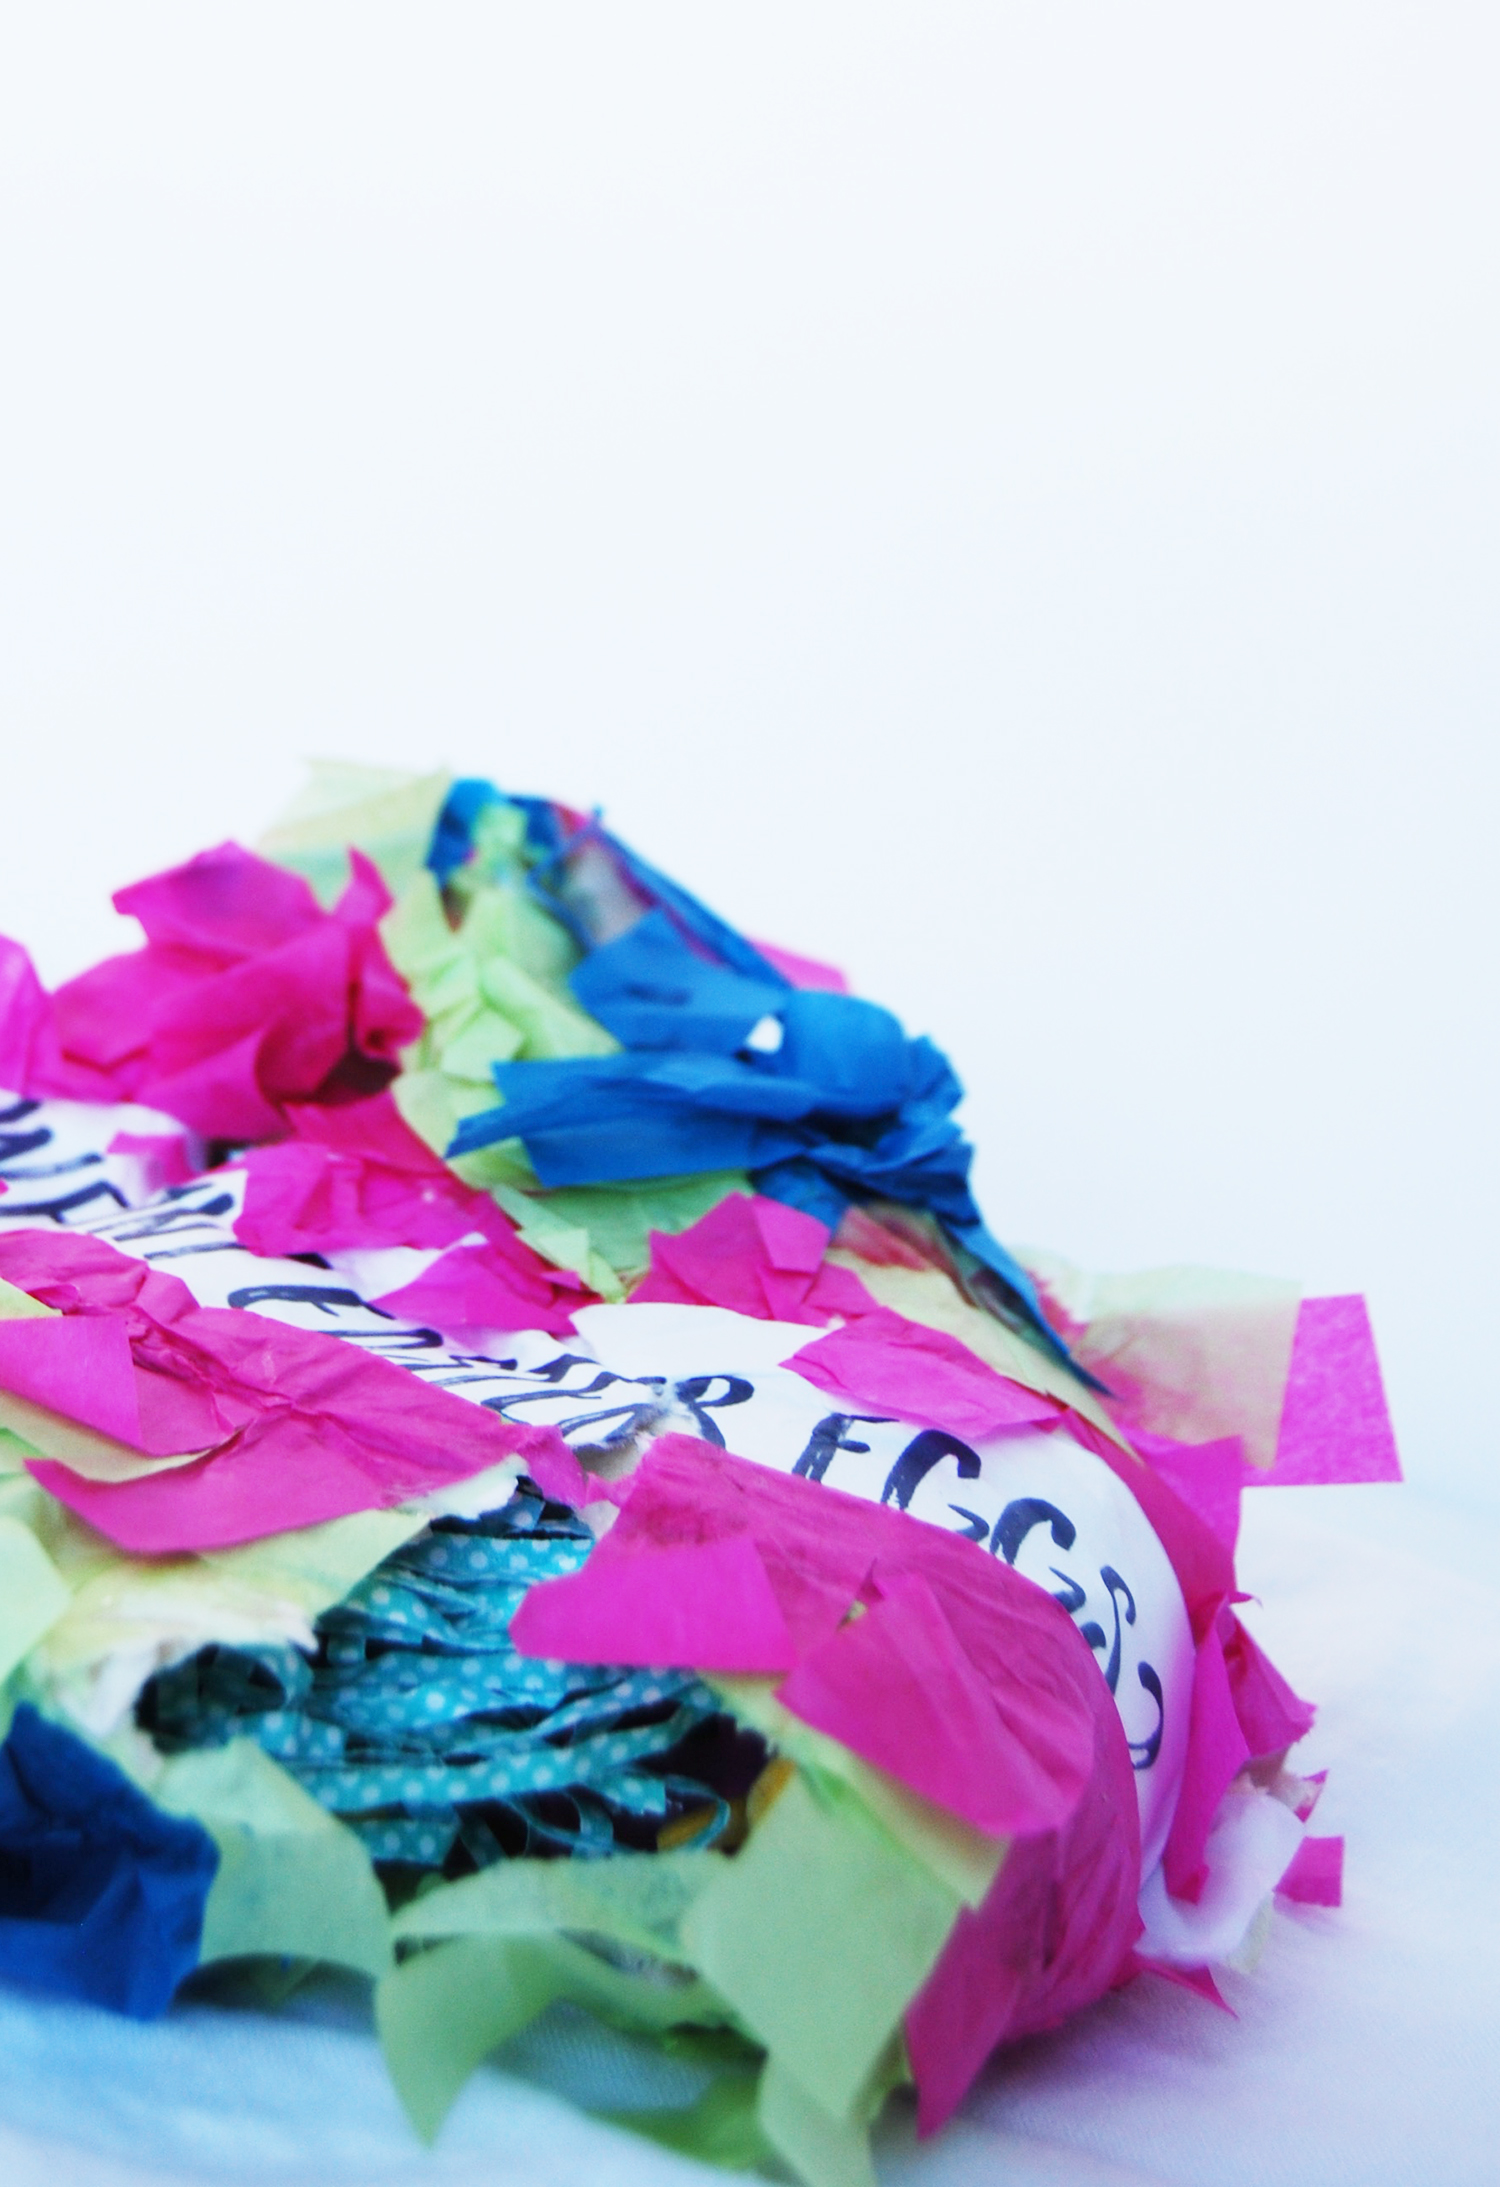
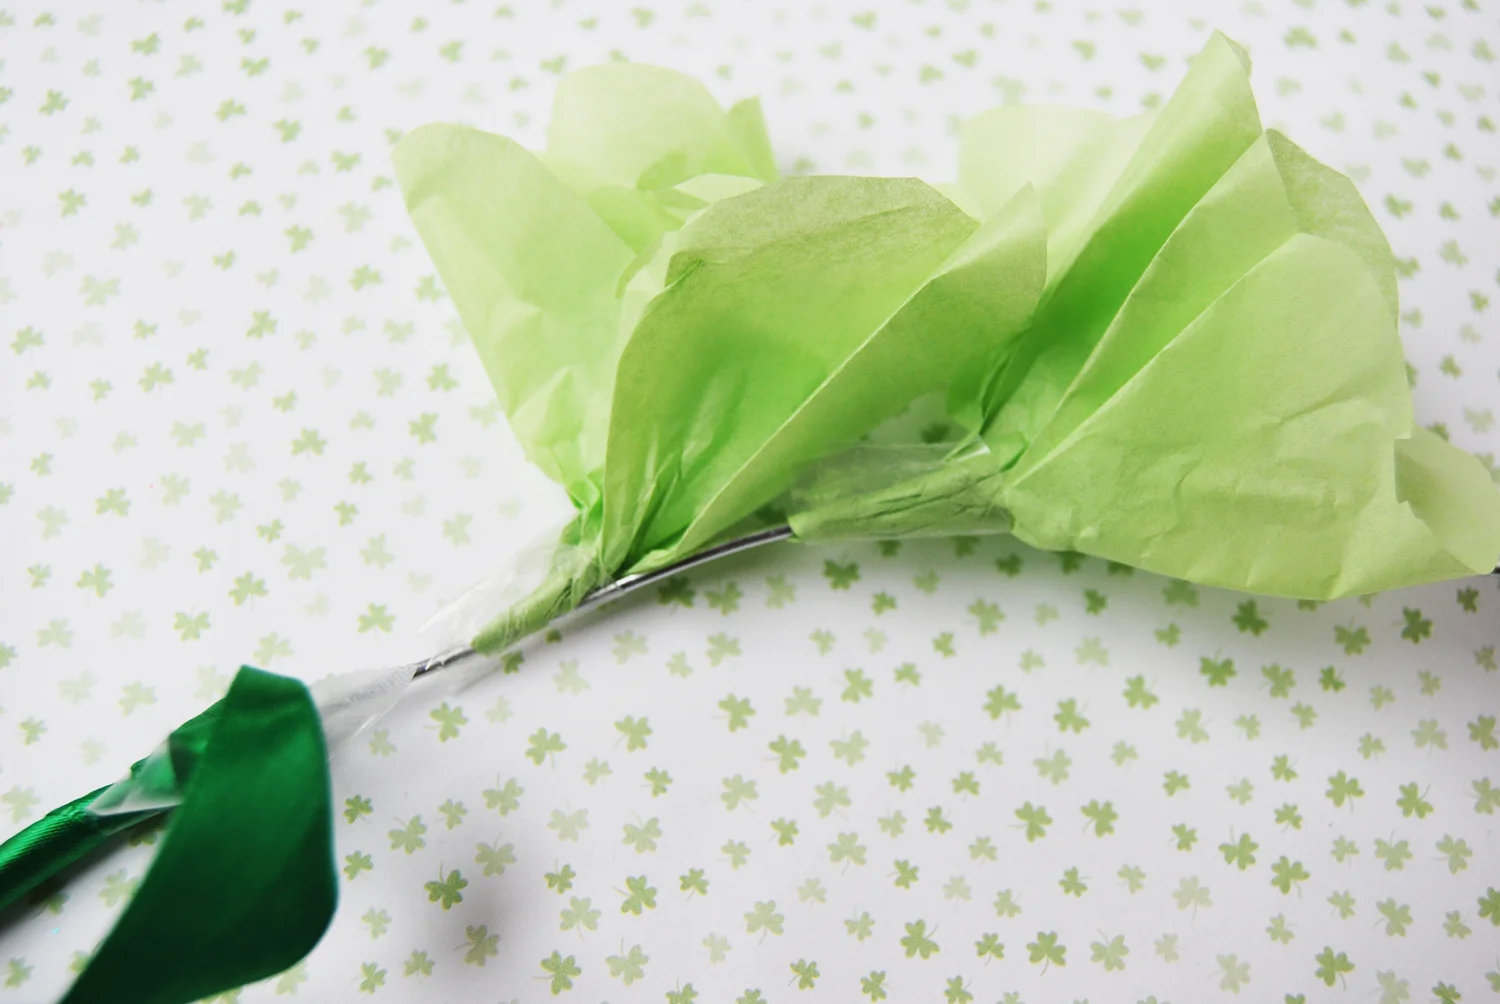
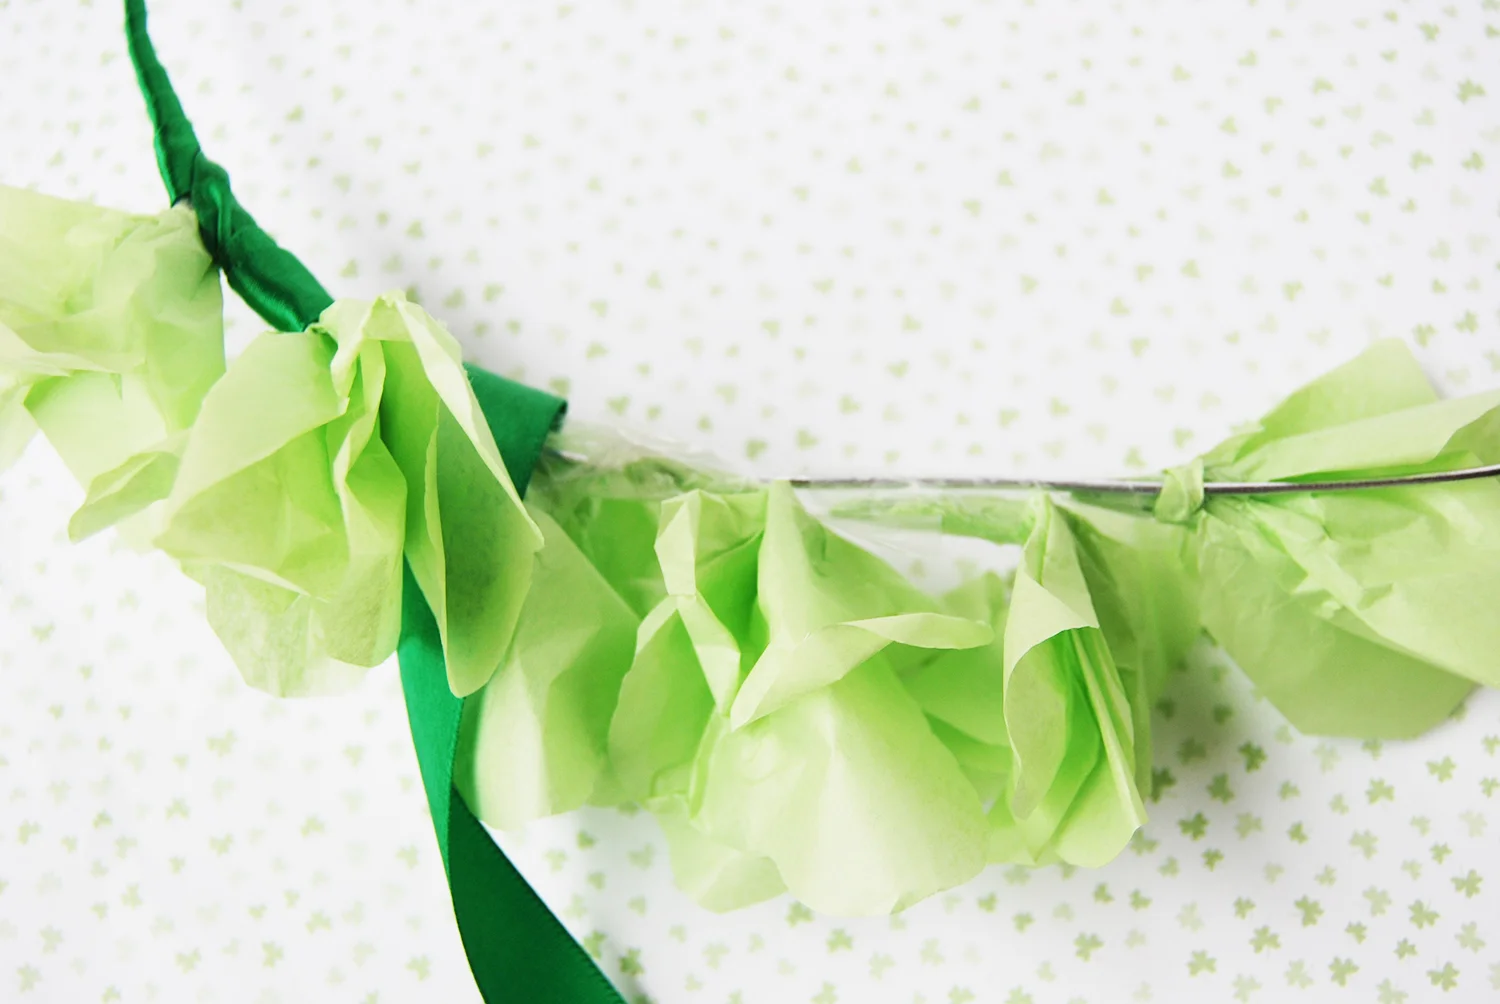
Step 2: Cut a small hole with a flap in the paper mâchè balloons. Place the easter grass, doodas & punchline of the joke in the piñata. Glue the joke to the outside of the paper mâchè. Cut 2" long strips from the tissue paper and then cut 1/2" slits in the 2" long strips to make "fringe." Start at the bottom of the piñata and glue the tissue paper to the paper mâchè. Keep alternating tissue paper colors until the piñata is covered except for the joke.

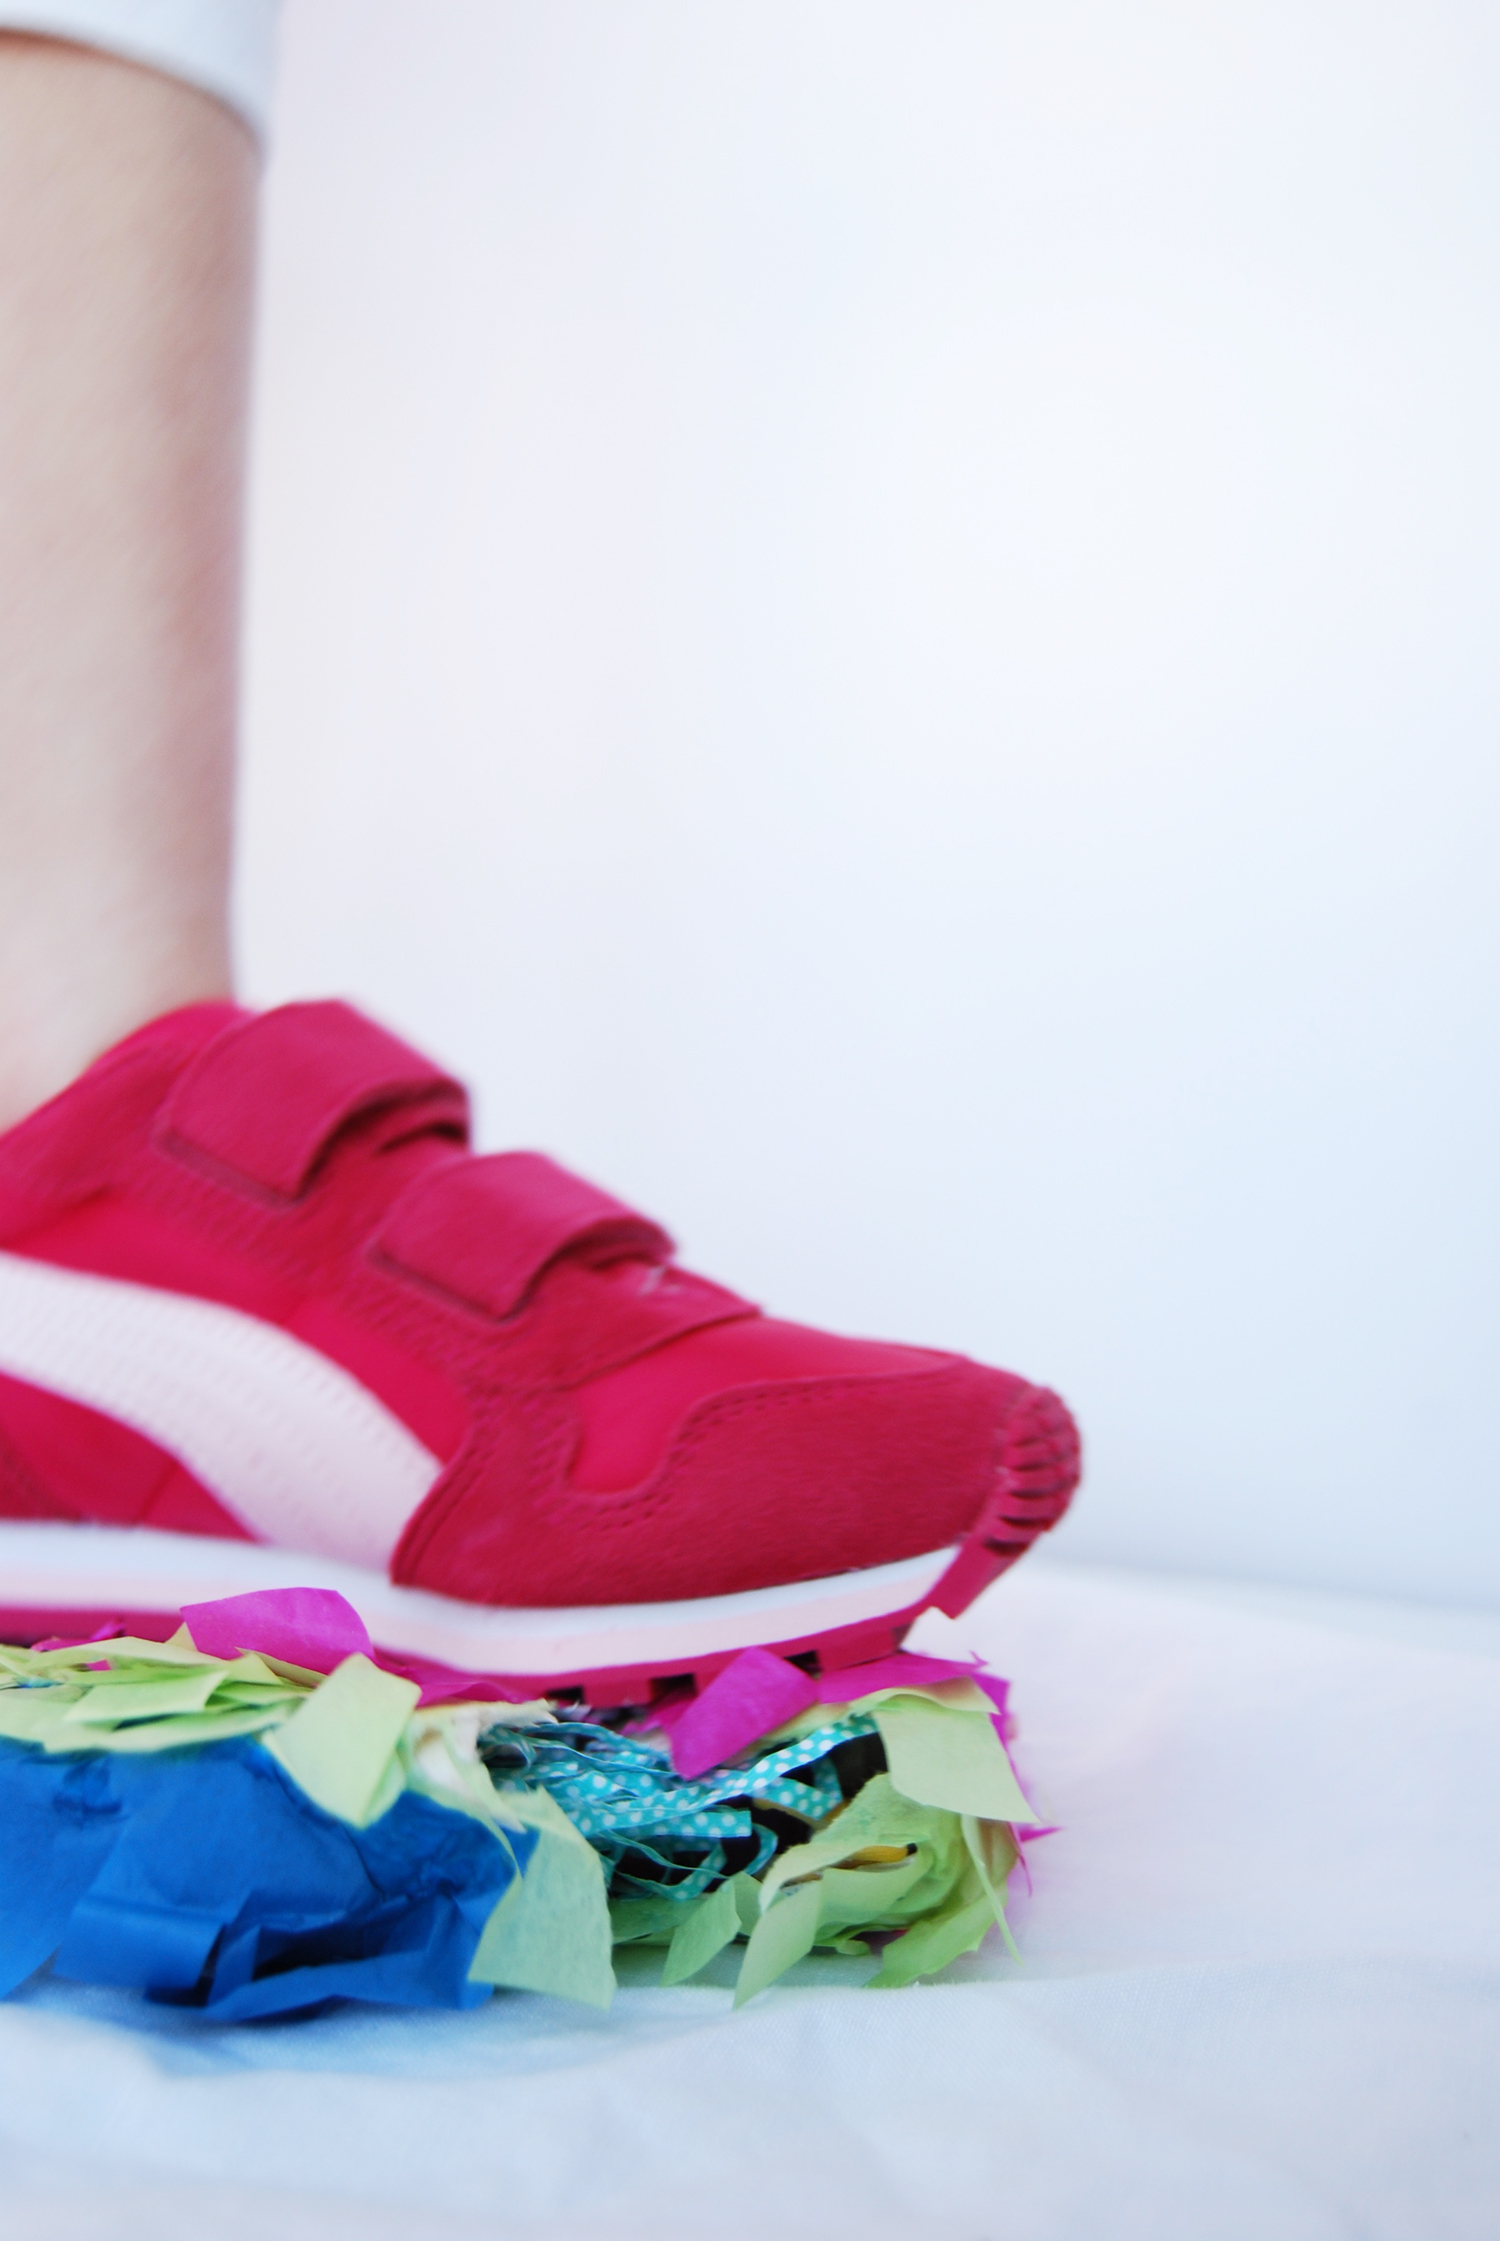
Step 3: Have someone stomp on the piñata to reveal the punch line and prizes inside.
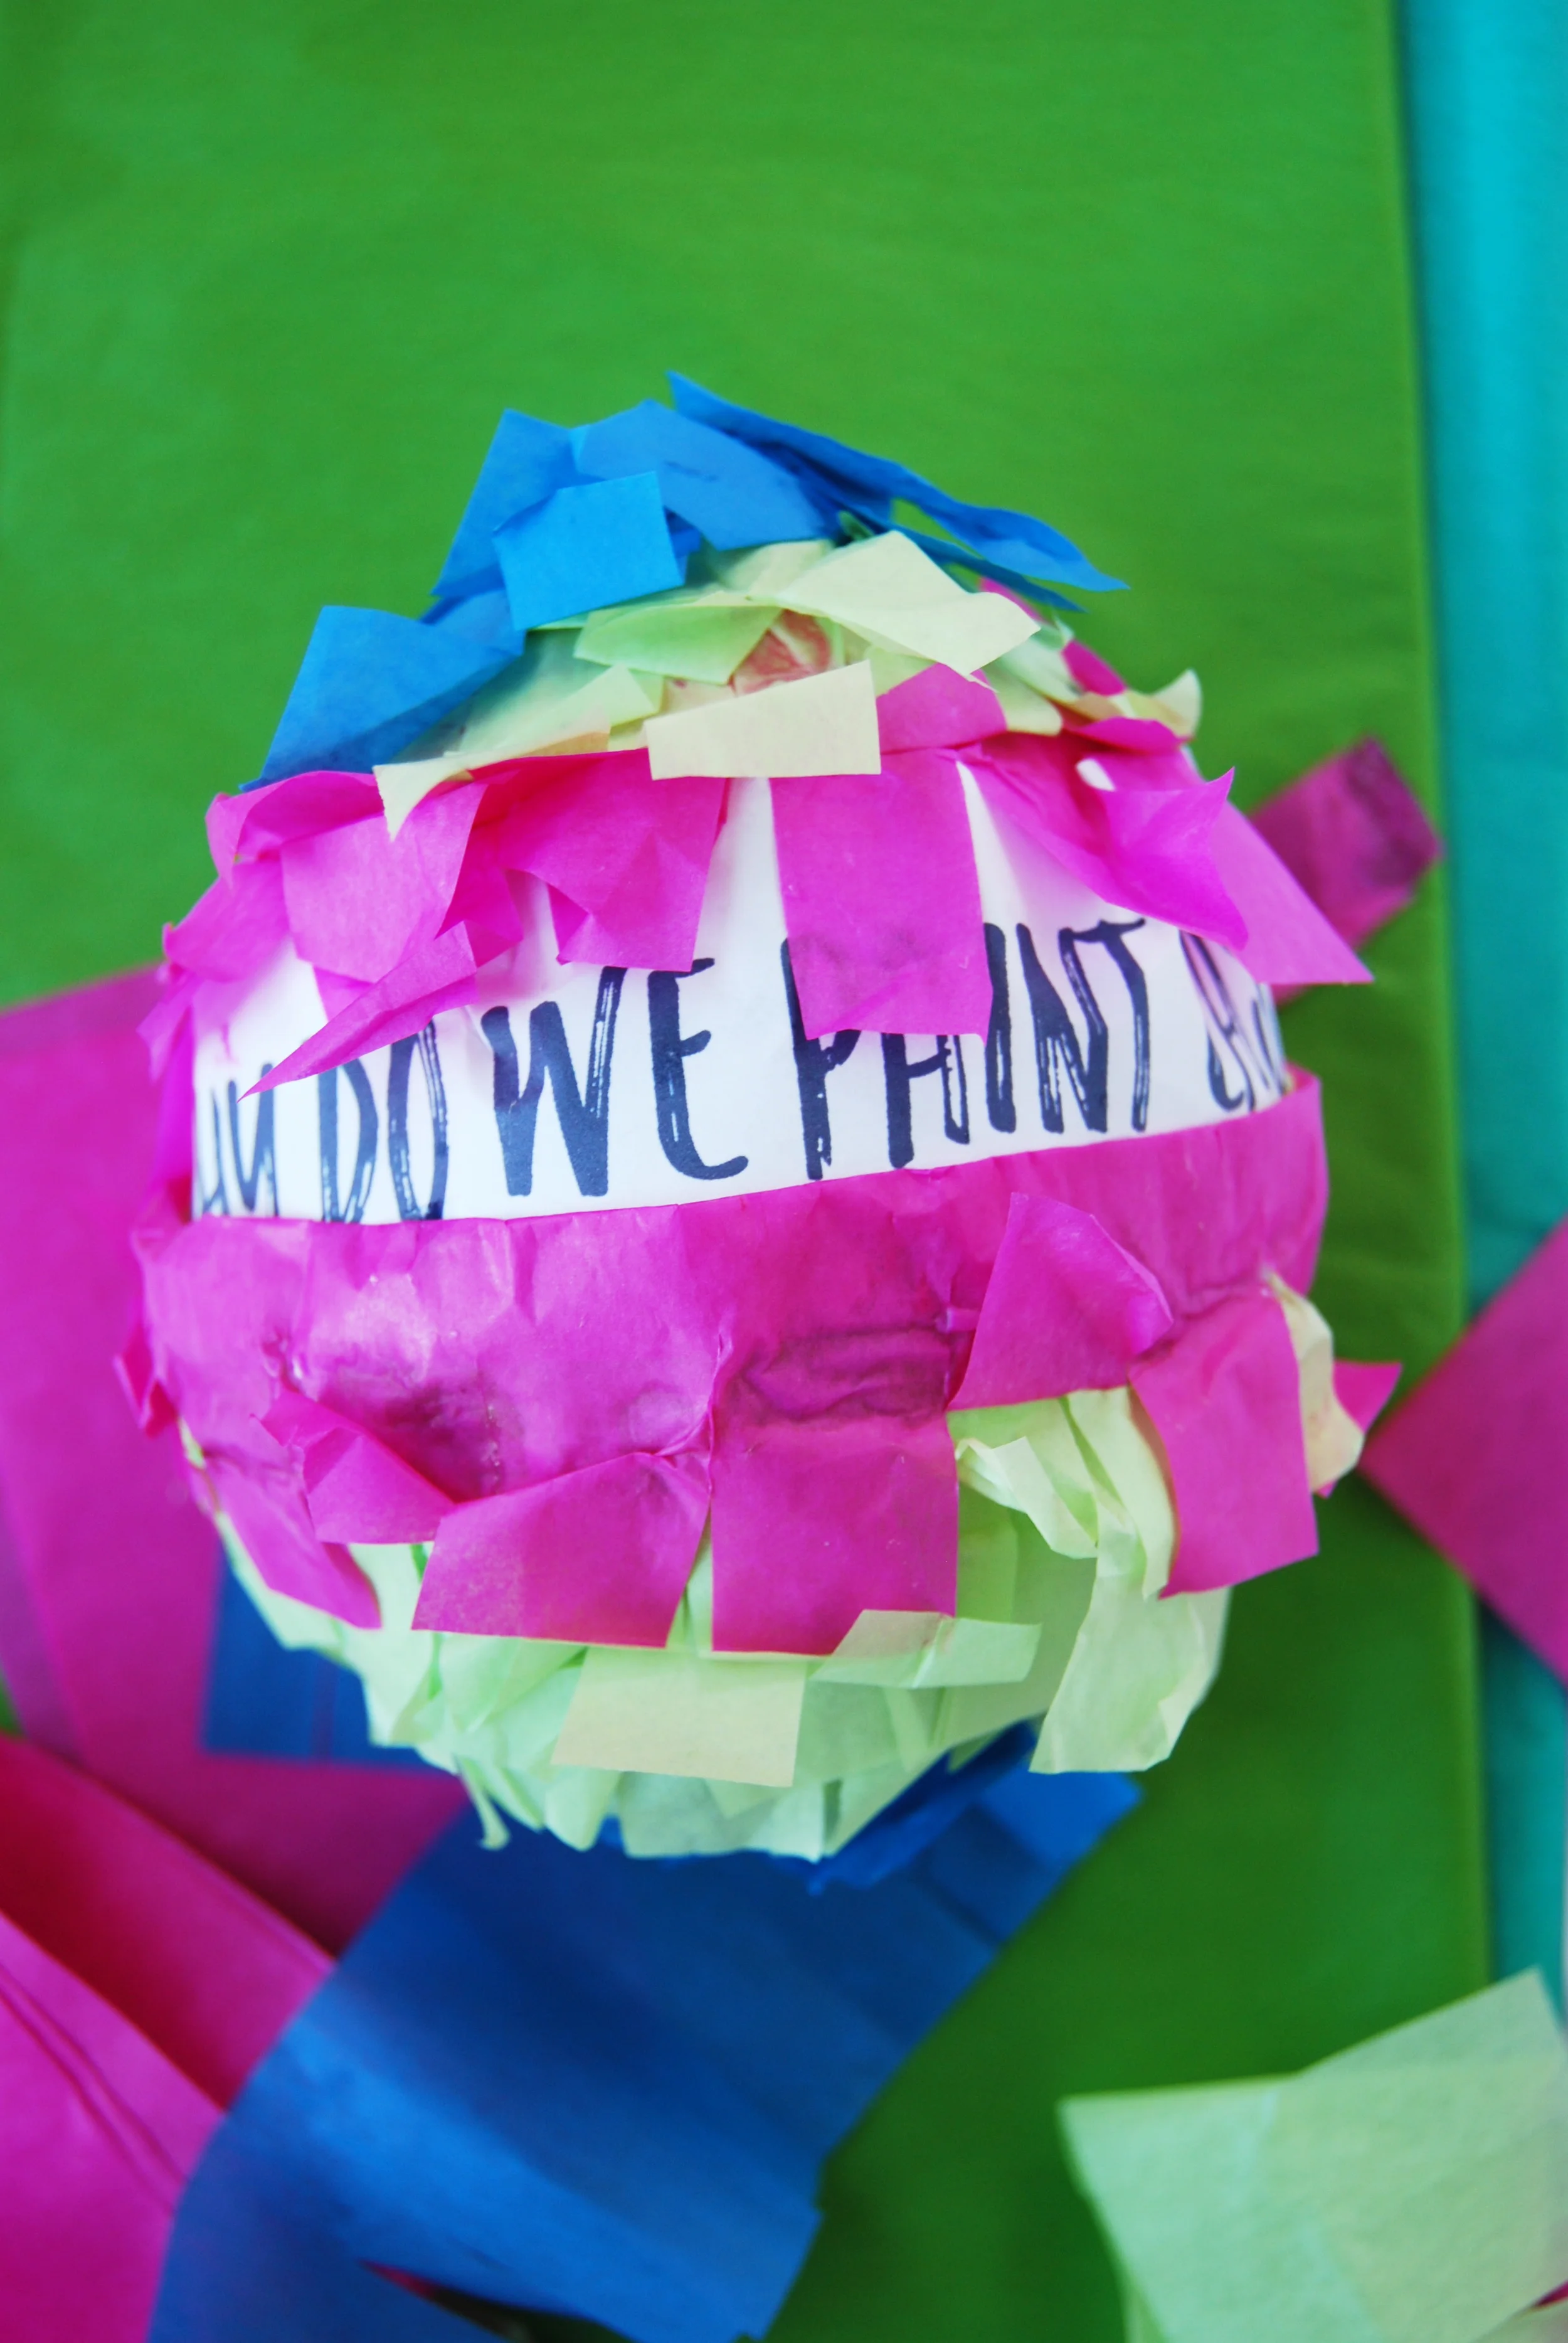
Here Is The Beast.

Here Is The Beast.

Well, you win some you stomp on some. Hopefully you will still be will me tomorrow after this mess of a project. I just have to remember that no matter the outcome, change is happening when creating. Also, when projects don't work out there is always a pastry somewhere with my name on it. Signing off kids.

MarchAndra Weberpinatas
Day 84 - Egg Cups.

Day 84 - Ta Da! How's that for an intro to Thursday? Let's throw in some jazz hands for a little drama. You can't see me but I'm waving my hands wildly. Speaking of drama, who's hosting a holiday dinner at their house this weekend? I always love to dream about perfectly arranged spring tablescapes. They are always cue the start of spring and renewal. When they feature beautiful spring flower arrangements, an array of pastel colors and gigantic dark chocolate bunnies these spring tablescapes make me sigh.

All this spring jazz got me to thinking about what I would put on my spring table, which brings me to today's project, succulent egg cups. Since we most likely have a few egg shells lying around this time of year, they are a simple and creative way to be kind to the earth and add beauty to any spring table.

Items Needed:

  • tiny succulent plants 
  • 3/4 egg shells
  • egg carton
  • green moss
  • fresh cut flowers (optional)
  • old tea cups

First find a work area and place down newspaper. Cut the top off the egg carton. Cut the egg carton in half if only creating six egg cups or less. Now remove the succulents out of their pots and break up the roots. Fill the egg shell with 1/2 dirt and then add one succulent plant per egg shell. Put the egg cup in the egg carton. Repeat until all egg cups are done.

Fill the tea cup 3/4 full with moss. Add a egg cup. Add a little moss next to the succulent and then add a fresh cut flower on top and bam! Place the egg cups on the a spring table for a lovely spring tablescape accent. When the spring entertaining is over, take the egg cups out of the tea cup and plant them directly in a pot. 

succulent_egg_cups_14.jpg

Who knew creating could be as simple as throwing together some dirt and eggs? Dirt & Eggs? I think I have a post for tomorrow. Kidding folks. Or am I? In any case, see you tomorrow!


Day 83 - Art Work.

Day 83 - Hello. Hello. We are half way through the week and I woke up this morning with an itch. Maybe it's because it's spring. Maybe it's because we have now lived in our home for three long years. Whatever the case, I woke up and said, let's finally fill these walls with some stink'n art. 

Maybe This One? It Says Hello.

Maybe This One? It Says Hello.

I have consistently put off donning our walls with art. It seems weird right? One might surmise because I have an art degree our whole house would be dripping in creative visuals. Nada. Nope. No way. I always made the excuse that it was because we live in earthquake country and I was worried about frames flying off the walls in the event of a big one. Excuse two, the walls are plaster so they would be hard to fix if the artwork had to be relocated. Excuse three, I would rather be eating chocolate and sipping a margarita. However, when I start to get honest with myself, it comes down to pure laziness. To find just the right art and put it in just the right location takes work. Lots of work. 

Something Abstract? Title "Circles."

Something Abstract? Title "Circles."

Today's project is to pick one location in your house that needs art.

Step 1) Measure the size of the area that needs filling. 

Step 2) Think of the medium that would work best for this area and how the piece of art would tell the story about you. Ask yourself, how will the art weave a tale with the room around it to become a bigger story of your life?

Step 3) Look for art or make art to fill the space. Often times a great personal photograph, simple circles or a typography can fill the bill.

Step 4) Order a print. I'm going to try Parabo Press for the first time. The color engineer print might be neato and I heart square prints. I'll post another time how they turnout.

Step 5) Find a way to display the art. A frame? Clipboard? Tape? What will work best with the art and the space?

Step 6 ) Enjoy the art and all the hard work.

This One!

This One!

Now, I am going to get back to filling the space right above our fireplace. It features a weird shaped mirror that has been taunting me for years. Today, is the day I cover up that mirror with some interesting art. Let me know how your project goes and see you tomorrow curators! 


MarchAndra Weber
Day 82 - Failure Falling.

Day 82 - Hi ya. Oh Tuesday. Sometimes the only thing good about Tuesday is it follows Monday. Isn't Tuesday suppose to be the most productive day of the week? It doesn't feel very productive at all today. Who else wants to crawl back in bed, put the covers over their head and sleep right into Wednesday?

Oven Dried Carrots. The Main Ingredient In The Failed Carrot Cream Cheese Macarons.

Oven Dried Carrots. The Main Ingredient In The Failed Carrot Cream Cheese Macarons.

Here is what is making me want to snooze right into the middle of the week. I failed today. I tried to make french carrot cream cheese macaron cookies for today's post and I did it wrong. Yep. I hear you saying it's not the end of the world. Yep. It isn't the end of the world but what bothered me about today is at every step, I made bad decisions. I took shortcuts and I ended up throwing 2 days of work away in the garbage. 

There Was Still Hope At This Point.

There Was Still Hope At This Point.

After sulking a while, I started cleaning which is what I do when I am mad at myself. As I opened an old box, inside were lots of photographs that spanned my life. The first thing I noticed was the amount of khaki pants I wore in the '90s. Yikes! Call the nostalgic fashion police and have me arrested. Second, the photos that stood out were snapshots of times when I was failing. Looking back at these photos of failing moments, it occurred to me this was when life felt the most interesting and rewarding. It made me realize failing isn't falling. Failing is fear falling away.

This brings me to today's project. Today, go back and find a photo of a time when there was failure in life. Take a few moments to think what failure created for you. This whole post makes me think of a quote by the author Elizabeth Gilbert: "Fear is the most uninteresting thing about each of us." Yes! So now I will fear less and fail more. Bring on round two with the french macarons and here's to many more photos without khakis. Signing of until tomorrow.

MarchAndra Weber
Day 81 - Petal Pastel.

Day 81 - Ciao! It seems like starting Monday with hello in Italian might make the day seem tolerable. It might even make Monday fell a little less mundane. It also takes me back to a time when I use to travel. It has been a very long time since I have been to Italy. One thing I remember from the trip to the boot shaped country, besides the vats of gelato I consumed, was constantly being surrounded by amazing artwork. As I think about the perfectly constructed renaissance masterpieces viewed, every single piece was created by hand with raw materials such as paint, pastel or pencil. Mind blown.

When was the last time we created something using raw materials with our hands? Sure, I use the computer and incredible Adobe programs everyday but I started to think it's been at least 15 years since I have used one of my favorite mediums, chalk pastels. In fact, when I opened the box of pastels today, I found a bunch of old photos from the college years tucked into the box. It was incredibly nostalgic and it got me to thinking about today's project.

Today, think about something you loved to do in the past. Maybe it use to be woodworking, or baking or candlestick making? Whatever your passion, take one step to try it again. Dust off the typewriter, pull out the drum set or sharpen up your whittle. It's funny how looking back can make a big impact on how we create moving forward. 

After, spending a few minutes with my box of pastels today, it was like an old friend stopped by for a visit. It only took a few minutes to get to know each other again but things have changed over the years. It might take some time to become besties but I think we can create some good stuff. Let me know how things go with your old friend. Arrivederci!

MarchAndra Weber
Day 80 - Go Fish.

Day 80 - Hey! It's Sunday. Lazy day maybe? Lately, there has been more crazy and less lazy over here and it makes me wonder if life will ever slow down. Next up on the never ending list of stuff-to-do is planning for a little ones birthday party. If I haven't mentioned before, birthday's are big at our house. Let's just say, it's not a party at our house until a someone falls asleep with chocolate all over their face and with a broken DIY piñata in their arms. In other words, it gets crazy fun here.

The Initial Rough Sketch.

The Initial Rough Sketch.

The craziness starts with the planning. I can't help myself. I have a terrible compulsion to DIY everything. I'll blame my parents and the epic "Pink Flamingo" party they threw in '83. Are there photos of said party? Heck no. They all have been burned. However, if the internet had been fully around in '83 the "Pink Flamingo" party would have broken Pinterest. It was DIY at it's best. 

The Revised Electronic Artwork.

The Revised Electronic Artwork.

Let's get back to today's project. As I get into DIY throw down mode, let's dedicate today's project to party and invitation design.

The Color Version.

The Color Version.

The invitation starts the party. It gives life to the party. It gives color to the party and not to mention the theme! Today, let's practice invitation design and go fish for a great party theme.

Pick an object and make a quick drawing in your note book of the object. Maybe it's a cupcake, hot dog or fish. The object doesn't matter. The next step is to draw the same object again in a very different way. Maybe it's bigger? Maybe its turned? Maybe only half of the object is visible. Now, draw the same object for a third time in yet again in a different way. Now imagine the colors and fonts might work with the theme?

To give you an example, we are having a "Go Fish" party. There were a few iterations to the invitation illustrations before one was selected by the birthday boy. 

What do you think? Funny how slight changes to scale and cropping make the start of the invitation designs so different. I have to get back to making a cardboard row boat for the party but let me know how your next party turns out and stay tuned. There will be more posts and creating for the upcoming party. Signing off till tomorrow.  


MarchAndra Weberdesign
Day 79 - Date A Carrot.

Day 79 - Ya. Ya. Ya! It's Saturday! I woke up this morning dreaming of carrot cake. Oh, how I love carrot cake. Oh that super rich creamy cake chocked full of spice. Swoon. Is it just me or is there something wonderful, warm and yet tangy about each flavorful bite? Yet, carrot cake is a diet hangover waiting to happen and everyone I know is trying to get fit and stay healthy. It got me to thinking how do I create a better for you carrot cake recipe?

Today, I experimented and came up with "Date A Carrot" snack cake recipe. It's below. Now it's your turn. Today's project is to get creative with an existing recipe and modify it in a new way. How can a recipe be changed for the different? Maybe add a new ingredient? Try a new pan? Add a few pinches of love? Just get creative!

In the meantime here is the "Date A Carrot" recipe. I replaced the ton of the sugar and flour that is in a typical carrot cake recipe with dates, honey and oats. Yum!

Date A Carrot Recipe

Serves 9

Ingredients

  • 2 cups old fashioned oats
  • 3/4 cup pitted dates
  • 1 teaspoon ground cinnamon
  • 1/2 teaspoon ground ginger
  • 1/4 teaspoon cloves
  • 1/2 teaspoon nutmeg
  • 3 tablespoons chia seeds
  • 1 cup coconut flakes
  • 1/2 teaspoon salt
  • 1/2 cup coconut oil
  • 2 large eggs
  • 1/4 cup honey
  • 2 cups shredded carrots

Topping (optional)

  • 1/4 cup coconut oil
  • 3 tablespoons coconut cream
  • 2-3 tablespoons powdered sugar

Preheat oven to 350 degrees. Line a 8" x 8" baking pan with parchment paper.

In a blender or food processor, pour in the old fashioned oats and pulse until 50% of the oats look like flour. Pour the flour in a bowl and set aside. Without cleaning the blender or food processor, add the dates. Blend the dates till creamy. 

In the bowl with the oats, add the cinnamon, ginger, cloves, nutmeg, chia seeds, coconut flakes and salt. Stir till combined.

Place the coconut oil in a bowl on a stand up mixer and beat for 30 seconds. Add the eggs one at a time till combined. Add the honey and beat for 1 minute. Add the carrots and dates. Blend and slowly add in the dry flour mixture to the wet mixture. Mix until combined. Press the dough evenly in the bottom of the pan. Bake for 16-18 minutes or until a tester comes out clean. 

Let cool on a wire rack. In the meantime, place the coconut oil in a microwave safe bowl and heat for 5-10 seconds. Add the coconut cream and powdered sugar to the warmed coconut oil and whisk till combined. Slowly drizzle the topping onto the snack cake. Once the topping is set, remove from pan, cut and enjoy. Store for 2 days in an airtight container in the refrigerator. 

Report back. Did you find it stressful to change the recipe? I need to get back to stuffing my face full of "Date A Carrot" snack cake. Later taters.

Day 78 - Hatching Politics.

Day 78 - Hello! It's Friday. As we enter the weekend, I scoped out news stories looking high and low for project ideas. Did anyone see the story about Leonardo DiCaprio kissing a bear before accepting his Oscar? That was a moving photo. Everything else in the news is about the upcoming U.S. election including the state of Donald Trump's hair. It occurred to me that I don't know much about each candidate and what they bring to the table. Yes, I have been living a hole. Yes, just like Brie Larson in "Room." Wait. No, sorry. I just read the description of "Room."  She and her son lived in a room for 5 years?! I need to watch this movie. Now I am rambling. Let's talk about the today's project.

Take at least 10 minutes to research and start a dialogue with yourself or a friend about a candidate in the U.S. election. Hatch your political views. Remember to keep the conversation semi-civil even with yourself. Here are a list of questions to start the conversation:

  • Who will you vote for in the November general election? Why?
  • How is this candidate qualified to run the free world?
  • Does this candidate represent the U.S. in a positive manner?
  • Will this candidate change the nation in 4 years? The world? If so, in what way?
  • Most importantly, if this candidate is elected, what band would play at the inauguration? 

What did you think about hatching politics? Are you still talking to your friend after the discussion? How about yourself? I'm going to go watch "Room" and go style my hair like a serious candidate. Chat with you tomorrow!


MarchAndra Weberpolitics
Day 77 - Lucky Day.

Day 77 - Hey there leprechauns! Happy St. Patrick's Day. May the day be filled with pots-of-gold, rainbows and green beer. I'll make today's post short and sweet so we can all get back to scouting out and pinching people not wearing green. 

Today let's make someone's St. Patrick's Day super lucky. Let's metaphorically drive the snakes right out of their life and brighten up their day with a beautiful DIY shamrock tea towel bouquet.

Items Needed:

This post contains affiliate links.

  • shamrock template (printable here)
  • 1 - tea towel {affiliate}
  • fabric or acrylic paint
  • 2 - 5" x 5" pieces of freezer paper
  • pencil
  • Exacto knife
  • cutting mat
  • paint brush
  • iron & ironing board
  • cardboard
  • flowers
  • ribbon
  • Lucky Day card (printable here)

Step 1: Print shamrock template. Trace the shamrocks on the freezer paper with the pencil. Using the Exacto blade and cutting mat, cut out the three shamrocks from one of the 5" x 5" pieces of freezer paper, shinny side down. You now have a shamrock template. 

Step 2: Unfold and layout the tea towel. Decide the location for the shamrocks. Place the shamrock template shinny side down in the desired location. Place the other piece of 5" x 5" freezer paper behind the tea towel shinny side up. There are now three layers. The top is the shamrock template. The middle is the tea towel and the bottom is the other piece of freezer paper.  Warm up the iron with the steam turned off. On the ironing board, iron the shamrock, tea towel, freezer paper layers together. The two shinny sides will warm up under the heat of the iron and adhere together so the paint will stay put. 

Step 3: Load up the paint brush with paint and brush over the shamrocks. Let dry. Peel off the freezer paper and shamrock template.

Step 4: Fold the tea towel and place the flowers in the middle. Tuck the towel under a few times. Tie with a ribbon and add the Lucky Day card.

Done. Who wouldn't feel super lucky to receive a beautiful, creative and thoughtful gift? Happy St. Patrick's Day lads & lassies!

Day 76 - Jelly Bean Chic.

Day 76 - Alright folks. How's everybody doing today? It's Wednesday and who's a bit on the cranky side today? Me! Me! Me! Man alive, I woke up on the wrong side of the tracks. Wait, I don't think that's the right phrase to use. Oh but who cares. "Bear" (Grrrr) with me on this grumpy day. 

There are two things that always get me out of a cranky funk: sugar & shopping. Well, let's throw sugar & shopping in a box, add some paint, close the lid and shake up some fun.

For today's project, we will be making a jelly bean t-shirt. Yep, that's right. We are going to paint a shirt using Jelly Belly® Jelly Beans. Yes, that's right. I have lost my stink'n mind but let's try this crazy idea anyway.

Jelly Bean T-shirt 

This post contains affiliate links.

If you have a happen to have a long sleeve t-shirt as I did today, cut the sleeves off with the scissors. Now, place approximately 20 -30 jelly beans into a disposable cup. Pick two or more colors of acrylic paint. Place approximately 1 tablespoon of each color on top of the jelly beans in the disposable cup. Dump contents into the cardboard box. Close lid tightly and shake. Open the box and add the t-shirt. Shake until the shirt is appropriately cover in paint. Let the t-shirt dry and then wash and dry separately. 

What do you think? Was it fun creating something crazy? Well, I need to get back to being cranky and eating more Jelly Belly® jelly beans. See you tomorrow kids.

Summary Block
This is example content. Double-click here and select a page to feature its content. Learn more
Day 75 - Painted Daisies.

Day 75 - Hello. Hello. It's Tuesday. At least it isn't Monday! Whew. As the weeks fly by it has hit me that Easter and spring holidays are right around the corner. I have mentioned a million times but let me say it again, holidays are big at our house. It's hard to imagine our holidays without boats full of glitter, a truckload of DIY projects and copious amounts of buttery food. 

However, as life gets more busy, is it just me or is it harder to make time to make holiday's special? It's nearly impossible to fit in a hour to create a big project found on Pinterest. Thinking about making Aunt Bettie's traditional holiday recipe becomes a chore. Creating a holiday table that is well styled and memorable isn't happening. There is just no time!

Well, let's try a fast and easy project today. The painted daises table runner project will start to to make any spring table burst with style and it should only take about 10 min, if all the supplies are available.

Painted Daisies Table Runner

This post contains affiliate links.

Step 1: Measure the table where the runner will be placed. Cut the paper to the measurement. Place paper on a flat work surface. 

Step 2: Cut the tops off a few daisies. Pick your paint color and apply paint on the paper plate. Now, either paint the daisy with a paint brush (optional) or dunk the daisy into the paint face first.

Step 3: Go to work stamping the daisy face down the paper. Make the daisy stamps overlap or create a deliberate pattern. Let the creativity spring. Let dry and poof! You have a super fun and stylish way to kick off a spring celebration table.

We are now one step closer to creating a special holiday table that is fast and stylist. Ok, gotta go work on that recipe from Aunt Bettie. See you tomorrow and keep creating!


Day 74 - Spring Forward.

Day 74 - Hey There! It's a start of a new week and it's almost spring. It's time to get down to brass tacks. In other words, let's get down to the basics today. Let's clean house, air out the curtains and hang things out to dry. Let's get back to talking about why we need to create.

This post contains affiliate links.

Bee Exhibit At the Oakland Museum CA. Artist Unknown.

Bee Exhibit At the Oakland Museum CA. Artist Unknown.

It's been a couple of months since I started Create & Change. I keep asking myself, "Is this important? Is anyone reading this? Is it changing anyone? Are only my mom & dad reading this stink'n blog?" I always come back to a very simple, Yes. It's important because being creative fuels the change I want to see in the world. And yes, only my mom & dad are probably reading this daily but that's ok. They are beautiful people and love to create stuff too. Plus, I now have a reason to make super thick milkshakes and peruse the dollar bin at Target. So it's all going in the right direction!

Oakland Museum CA Artwork.

Oakland Museum CA Artwork.

Going in the right direction, takes us to today's project. Today think about one thing you want to change in the world. Set an intention. Write it down in your LBNB {affiliate} and take one step to make the change you want to see. Maybe it's being your own boss? Folding all the socks in your drawer a certain way? Writing the first word of your book idea? Developing a good joke? Seeing an old friend? Sharing your favorite recipe? Starting a community garden? Writing new line of code? Developing a new yoga class? Woodworking a bench? Going for a run? Making a first brush stroke?

Let's keep thinking big and ring in spring with a creative spring forward. See you tomorrow!

P.S. The photos are from an adventure today. We explore the  Oakland Museum Of California and caught up with old friends. It was a great way to spring forward and get the creative juices flowing.


MarchAndra Weberspring
Day 73 - Shake It Thin Mint.

Day 73 - Hey. Welcome to Sunday. Last night, we transitioned to daylight savings time. Let me just tell you, I hate daylight savings time with a royal passion. It messes up everyone's rhythms including mine. No one sleeps, everyone eats at weird times and it seems like everyone is just plain grumpy.

However, there is one thing that makes me happy this time of year. It's Girl Scout cookie season and that means Thin Mints® are back. Yeewhaw! Who doesn't love a frozen Thin Mint® cookie? Don't get me started about the Caramel Delights®. I'm still making decisions about about Peanut Butter Patties® but they will do in a pinch. 

It got me thinking today. How could I create something that would help with all the grumpiness that daylight savings brings? Well, maybe a good old fashioned milk shake with Thin Mints® might make everyone a little less grouchy.

First, let me start with I tried for two days to get my hands on some actual Thin Mint® cookies. The Girl Scouts have a terrific "Cookie Finder" where a zip code is entered. The "Cookie Finder" then lists local times and locations where cookies will be sold. I used the cookie finder and found 5 places within 5 miles where the Girl Scouts would be selling cookies. To find a box of Thin Mints® turned into an adventure for me to because it's raining here in Northern California and it's been raining for days. When it rains, the Girl Scouts take cover and don't come out to sell cookies. Smart girls.

So, after five attempts to buy Thin Mints®, I had to by a another brand of mint cookies for this project but you better believe once the rain stops I'll using the "Cookie Finder" and pick up 1 or 5 boxes of Thin Mints®!

Let's get down to the ingredients of today's project. Let me just say this "Shake It Thin Mint" shake is heavenly and indulgent. So invite a friend or 3 over to help create & enjoy the fun.

Shake It Thin Mint Ingredients

Makes approximately 4-8oz shakes

Homemade Magic Shell (optional)*

  • 1/4 cup coconut oil*
  • 2 cups chocolate chips*

Milk Shake

  • 5 scoops vanilla ice cream
  • 6 leaves of fresh spearmint washed and dried
  • 7 Thin Mint® Cookies
  • 1 cup whole milk

*Magic Shell (optional): Combine coconut oil and chocolate chips in a microwave heat safe bowl. Heat for 30 seconds. Stir. Microwave for 30 more seconds. Stir again. Keep repeating this process until smooth.

In a blender, add ice cream, spearmint, cookies and whole mint. Blend till smooth. Add 2 tablespoons of coconut & chocolate mixture. Pulse blender a few times. Serve immediately and garnish with another Thin Mint® and add a drizzle of homemade magic shell on top of the shake. Yum.

*The coconut & chocolate chips mixture is a homemade version of Magic Shell Chocolate coating. It becomes solid when placed over cold ice cream or in the refrigerator. There will be leftovers. Store in an air tight container at room temperature.

Now, maybe we can't make this shake a daylight savings tradition. That way the lost hour of sleep won't make a dent in our spring time happiness. See you tomorrow kids! I gotta get my beauty rest. ;)


Day 72 - Leprechaun Magic.

Day 72 - Hooray! We made it to Saturday. While I was tossing up pancakes this morning and dreaming out the window, I noticed a big bunch of clover growing in our yard. It made me think of St. Patrick's Day and Leprechauns. Leprechauns have always terrified me. It might be because the 1993 horror movie "Leprechaun" {affiliate} scared the shamrocks out of me.

However, as I looked at the clover sweating in fear, my daughter interrupted my dark visions to ask me how Leprechauns get to this world. I blurted out a "By coming through a door." She responds "What door?" I respond "Well, we have to make a door."

This brings me to the project today. We are going to dress up a little wooden door to create some Leprechaun Magic.

Items Needed:

This post contains an affiliate link.

First, order the door. When waiting for the door to arrive, think about Leprechauns. How would a Leprechaun door look? I decided it needed to be a mossy, glittery and feature a rainbow. Also, glitter gold rocks seemed necessary as did a sign stating "Look'n For Gold Be Back in 5." 

Don't let my thoughts stop you from letting your imagination run wild. Take a different path. Think up something new. Maybe shamrocks and pot's-o-gold painted on the door? Maybe a bright green door with one darker green shamrock? Maybe an all black door with a sign "Step Back. Leprechaun's inside? Once your door is complete, find a nice place outside set it up for those Leprechauns. 

Whatever you create, have fun creating the Leprechaun magic! See ya tomorrow lads & lassies.

Day 71 - Go Go Green.

Day 71 - Oh hello there. Who else has been overdoing it these days? Maybe it's indulging in too much Guinness or corn beef? The new years resolutions have worn off right? That coffee habit has gone from 2 cups to 9 per day. Yes. I feel you.

Personally, I have been eating chocolate like it's my last week on earth. This mode of living might be kinda ok if it wasn't for the fact I never drink water. As in, I'll go the whole day without drinking a sip. Nothing. Not a drop. Yes, I do realize it's a horrible way to treat my body. Will I change. Let's see.

After a little research, I have developed a delicious green concoction that might help us drink up and flush out all that indulgence. Let's get started on today's "Go Go Green" project.

Let's start with a bottle. Select a bottle that makes you swoon. I picked up a $5 glass bottle from the dollar bin at Target. However, it would be wise to select a bottle with a wide mouth so ingredients can be maneuvered in and out of the bottle. Clearly I didn't think of this and was more persuaded by the hot pink handle.

"Go Go Green" Ingredients:

  • 1 lime - 2 wedges
  • 1 granny smith apple - 2 wedges
  • 1 bunch of parsley - 3-4 sprigs
  • 1 bunch of mint - 3-4 sprigs
  • 1 fresh ginger root - 1" peeled
  • 1 cucumber - 2 slices

Each of the ingredients below have been said to have detoxifying properties. Parsley is cleansing, green apple has polyphenols (whatever that is but it sounds healthy, mint helps with digestion, ginger reduces inflammation, cucumbers provide antioxidants and lime is just dang delicious. 

Wash all the produce. Slice two thin wedges of the apple, lime and cucumber. Chop and peel 1" of ginger. Snip off 4-5 sprigs of mint and parsley. Now place all the sliced, chopped and snipped produce into the new bottle. Add water. Place in the refrigerator and let sit for at least 15 min. Drink your Go Go green juice all through the day. When the water gets low add more. After 12 hours, throw out the produce in the bottom of the bottle and start fresh.

Report back how you feel? Did this Go Go Green water create a change in you? And Folks, if you won't do it for yourself, do it for the chocolate for goodness sakes.

Day 70 - You Say Potato.

Day 70 - I Say, Let's Call This Whole Blog Off! Ha. Kidding about calling off the blog but I'm not kidding about potatoes. Who of us thinks of potatoes when we think of Ireland? Me! Anyone else? Today, I said to myself "Self, why do you think of potatoes when you think of Ireland?" Well, after a Quick Google search, there was mile after mile of amazing Irish potato recipes. Oh, man. They all looked savory and hearty. Maybe I'll whip up a recipe for another day. Look for an Irish potato recipe on day 324. 

When I was drooling over the potato recipes, I started thinking about Irish blessings. I Googled Irish blessings too. There are so many wise & kind words. Hum. How do we combine potatoes and an a kind Irish blessing for today's project?

Got it! Potato stamping! Remember potato stamping when you were a kid? How about we create artwork that combines the blessing and potato stamping together? Let's try it.

Here is what is needed:

  • A large potato
  • A small paring knife & cutting board
  • Watercolors
  • Paper plate or plate (pallet to hold the watercolor)
  • Paintbrush
  • Watercolor paper 
  • An Irish blessing

Step 1: Find a favorite Irish Blessing.

Step 2: Using the knife, cut the potato in half. Then cut an 1" wide slice from one of the potato halves. With the paring knife, cut a shape into the potato by cutting down into the potato about 1/4 -1/2 of an inch. Keep the shape simple such as a circle, square or triangle and be careful with the knife.

Step 3: Now pick 2 watercolors that fit the tone of Irish Blessing. Place some paint on your "pallet" and a few drops of water. Swirl the two colors but don't mix. Now take your paint brush and your potato stamp and dab the color on the cut out shape.

Step 4: Start to create a pattern with the potato stamp on the water color paper. Go one way and then the other mix it up. Have fun. Feel like a kid again. Then let the pain dry.

Step 5: Print out the Irish blessing selected. Cut it out as a square or circle and paste it onto the potato stamped paper. Maybe use a die cut stamp on the potato stamping to create shamrock shapes. Maybe then glue everything on a white piece of paper? Just have fun! See you tomorrow lads & lassies.

Day 69 - Lady Of The Ring.

Day 68 - How's it going there? My apologies by starting yesterday's post with "Top of the morning to ya." When I Googled "Irish Greetings" today I realized, "Top of the morning to ya." is a cringe worthy greeting. Apparently, everything I know about St. Patrick's Day, I learned from a t-shirt. Yeesh! My apologies to any Irish lads & lassies.

Today, I'm starting with the greeting "How's it going there?" From my research, it's more inline with a true Irish greeting. Let me know if I have this wrong as well. It's hard to find the truth on the internet.

Today's project includes the four leaf clover symbol. Well, once again I am getting St. Patrick's Day all wrong. The four leaf clover doesn't symbolize St. Patrick's Day. It is the 3 leaf clover that should be use to symbolized the holy trinity. Oh man. I've got to do my research!

Tomorrow, I'll investigate the history of St. Patricks Day to create a more authentic post. In the meantime, let's create an unauthentic but super cute "Lady Of The Ring" crown using tissue paper shamrocks.

Items Needed:

This post contains affiliate links.

Step 1: Make a head measurement with a strip of paper or measuring tape. Add 2 inches to the measurement. Put on safety glasses. Cut the steel wire with the needle nose pliers to the length measured. Loop the extra 1 inch on the ends of the wire to make two hooks.

Step 2: Print this shamrock template here. Place the template over the tissue paper and cut 8-10 shamrocks out of the tissue paper. Grab the shamrocks at center and twist. Take one twisted shamrock and place it 1/3 away from the end of the wire. Tape the shamrock to the wire. Repeat with the remaining shamrocks.

Step 3: Take the end of the green ribbon, leave a 3" tail on the ribbon and tie the ribbon to the end of one wire hook. Start looping the ribbon around the wire to cover the wire. When the shamrocks are reached, loop around the twisted part and cover the tape of the shamrock. Keep looping until all the wire is covered. Cut the ribbon and tie both ends of ribbon together very tightly. Cut any tails off the ribbon.

Step 4: Cut 6 feet of either gold or green ribbon. Fold in half and tie a slip knot around the back of the crown. Tie a bow to cover any showing wire.

Step 5: Enjoy your Lady of the Ring crown.  As you can see, my little lady was so excited to model the crown today. However, you don't need to be little to enjoy this crown. It would make a great accessory to any dames St. Patricks day outfit.

See ya tomorrow lads & lassies!

Day 68 - Irish Apricot.

Day 68 - Top of the morning to ya! With St. Patrick's Day right around the corner, who is ready to prep for the day full of rainbows, leprechauns and pots of gold? Me! Me! Me! I think I mentioned in an earlier post, holidays are a big deal around here in our house. It doesn't matter if it's Flag Day or National Donut day. If it's a holiday it's going to be celebrated.

Has anyone tried Irish Soda bread? Well, it is delicious. It's the kind of bread that is hard to stop eating. Slather it with butter and it's four leaf clover good. Also, it's a quick bread so, no yeast, no problem. I have always purchased a loaf of Irish Soda Bread. Today, I made space in my schedule, pulled out the old mixer and made Irish Soda Bread recipe with a new twist.

Today's project is to create the Irish Soda Bread Apricot Muffins below or dig up a recipe that is always on the "I'll try it one day list." Make space in the schedule and get baking.

Irish Soda Bread Apricot Muffins 

Makes approximately 15 regular sized muffins

  • 3 cups all purpose flour
  • 1 cup self-rising flour
  • 4 tablespoons sugar
  • 1 teaspoon salt
  • 4 tablespoons cold, salted butter cubed into 1/2 dice pieces
  • 1  3/4 cup cold buttermilk, shaken
  • 1 large egg beaten
  • 2 teaspoons grated lemon zest
  • 1 cup dried apricots finely chopped (1 tablespoon all purpose flour needed)
irish_apricot_soda_bread_12.jpg

Preheat the oven to 375 degrees. Place 15 cupcake liners into two (2) regular sized muffin pans.

Add the flour, self-rising flour, sugar and salt in and electric mixer bowl with a whisk attachment. Turn the mixer on low and mix ingredients. Add the butter and mix until combined.

In a bowl or measuring cup, add the buttermilk, egg & lemon zest. Whisk ingredients together. Slowly add the wet mixture to the dry mixture and mix on low till combined.

Place the apricots in a bowl and sprinkle with one (1) tablespoon flour. Stir the apricots into the dough.

Using an ice cream scoop, dish out level dough balls into the cupcake liners. Place the pans in the oven and bake for 22-24 minutes. The muffins are done when a tester comes out clean.

Cool muffins on a wire rack. Serve warm with butter. Best eaten day of.

irish_soda_bread_apricot_4.jpg

What do you think of these Irish Soda Bread Apricot Muffins? My taste buds say they are delicious but might need some extra spice. Let me know how your recipe turns out and what it was like to create something new. Now, I gotta go see if I can catch a leprechaun! See you tomorrow.


Day 66 - Botanical Adventure.

Day 66 - Hey ya! It's Sunday and Sunday means fun day. It's been raining for a couple of days here. We have been locked inside and with only a break in the clouds this morning. After breakfast, I said "Let's go get into some trouble." Which in my book means, let's go do something we wouldn't normally do and then go get a donut.

After some online research and lots of complaining from my companions, we decided to bounce right on over to our local botanical gardens. It just so happens we live by the UC Berkeley Botanic Garden which has a pretty amazing history. It has been around since 1890 and man alive some amazing plants. All of us, including the 2 little critters, were so happy to be outside and see many different sites, sounds and smells. Nature is weird and beautiful. It was a great adventure and it was right in our backyard.

Today's project is to go take an adventure or a walk to a local garden. Take your camera and start photographing. Take different angles. Look at the colors in the vegetation. Listen to the leaves rustle. Report back. Did something blow you away? 

Day 65 - Tiny Zen.

Day 65 - Hi There. It's Saturday. Hopefully it is a day of relaxing for everyone. Wasn't this week stressful? I found myself plopped down in front of my computer, my blood boiling and steam coming out of my ears a lot this week. Sitting in traffic and getting cut off by people who think they are more entitled than everyone sent my blood pressure soaring. Factor in over stimulation from a bunch of electronic devices, daily demands of life and copious amounts of caffeine and it's a perfect stress storm.

Nature always makes me feel better. Studies show walking in nature positively changes the brain. More information on "How Walking In Nature Changes The Brain" can be found here at The New York Times. However, we don't always have time to get outside to nature so let's bring the outside in.

Today's project is to create a Tiny Zen Garden for a desk or side table. Here is what you will need:

Tiny Zen Garden Project List

{This post contains affiliate links}

First, let me start by saying finding the right sand for the Tiny Zen Garden is key. Extra fine powdery sand is needed for this project and it was hard to find. I looked in 3 or 4 stores and then ended up just ordering it from Amazon. Next, absolutely find a container for your Tiny Zen Garden that has a lid or use a dish that can be placed into another container. The sand does tend to go everywhere when not enclosed.

Once the container and sand are collected, take a 10 min walk and find natural objects. Flowers, rocks, moss and a small stick for drawing the sand. Bring the objects back and assemble the Tiny Zen Garden. Pour the sand into your dish, place the natural objects and the Tiny Zen Garden is ready to go

Do some drawing the in sand. Move some rocks around. Switch out the flowers. I found it pretty incredible how much better I felt just dragging the stick through the sand as I sat at my desk.

zen_garden_diy_tiny_3.jpg

What do you think?  Will you try to find your Zen today?


MarchAndra Weberzen