Design & Creative Development
awc_logo_2023_create_change.jpg

Create & Change

Posts tagged popular posts
Here Is the Easiest Recipe To Celebrate Spring.
rhubarb_sauce_sq.jpg

// hello friends-

The start of spring is here and the good stuff has started to bloom. Flowers are popping, sunshine is bursting, birds are singing and bees are humming their way right into the most creative time of the year. For a short few weeks spring also provides us with the perfect spring vegetable:

Rhubarb!

In my book, this darling stalk of red, glossy goodness makes spring the most delightful time of year. You can read all about this unappreciated vegetable here on: EarthEasy “Rhubarb: The Unsung Hero Of The Spring Garden.”

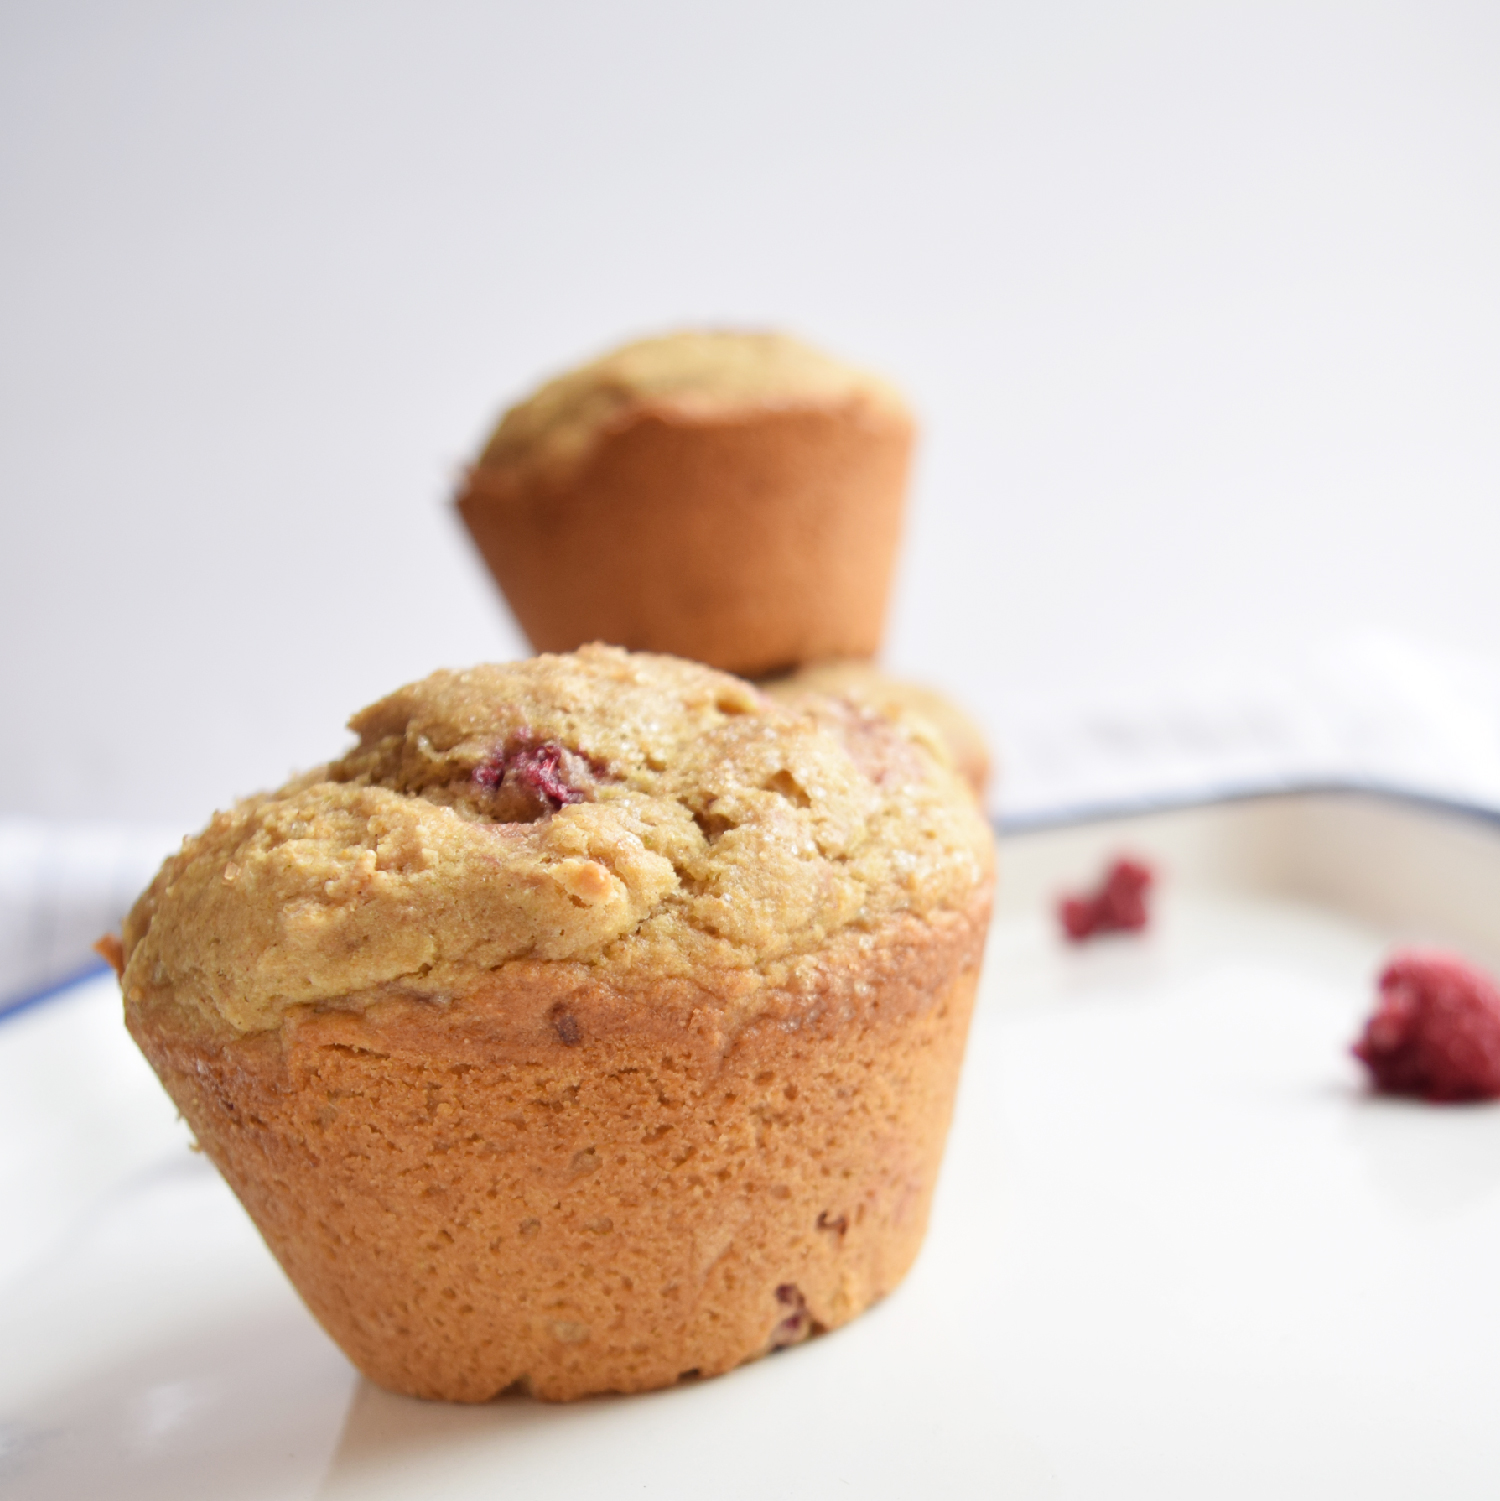
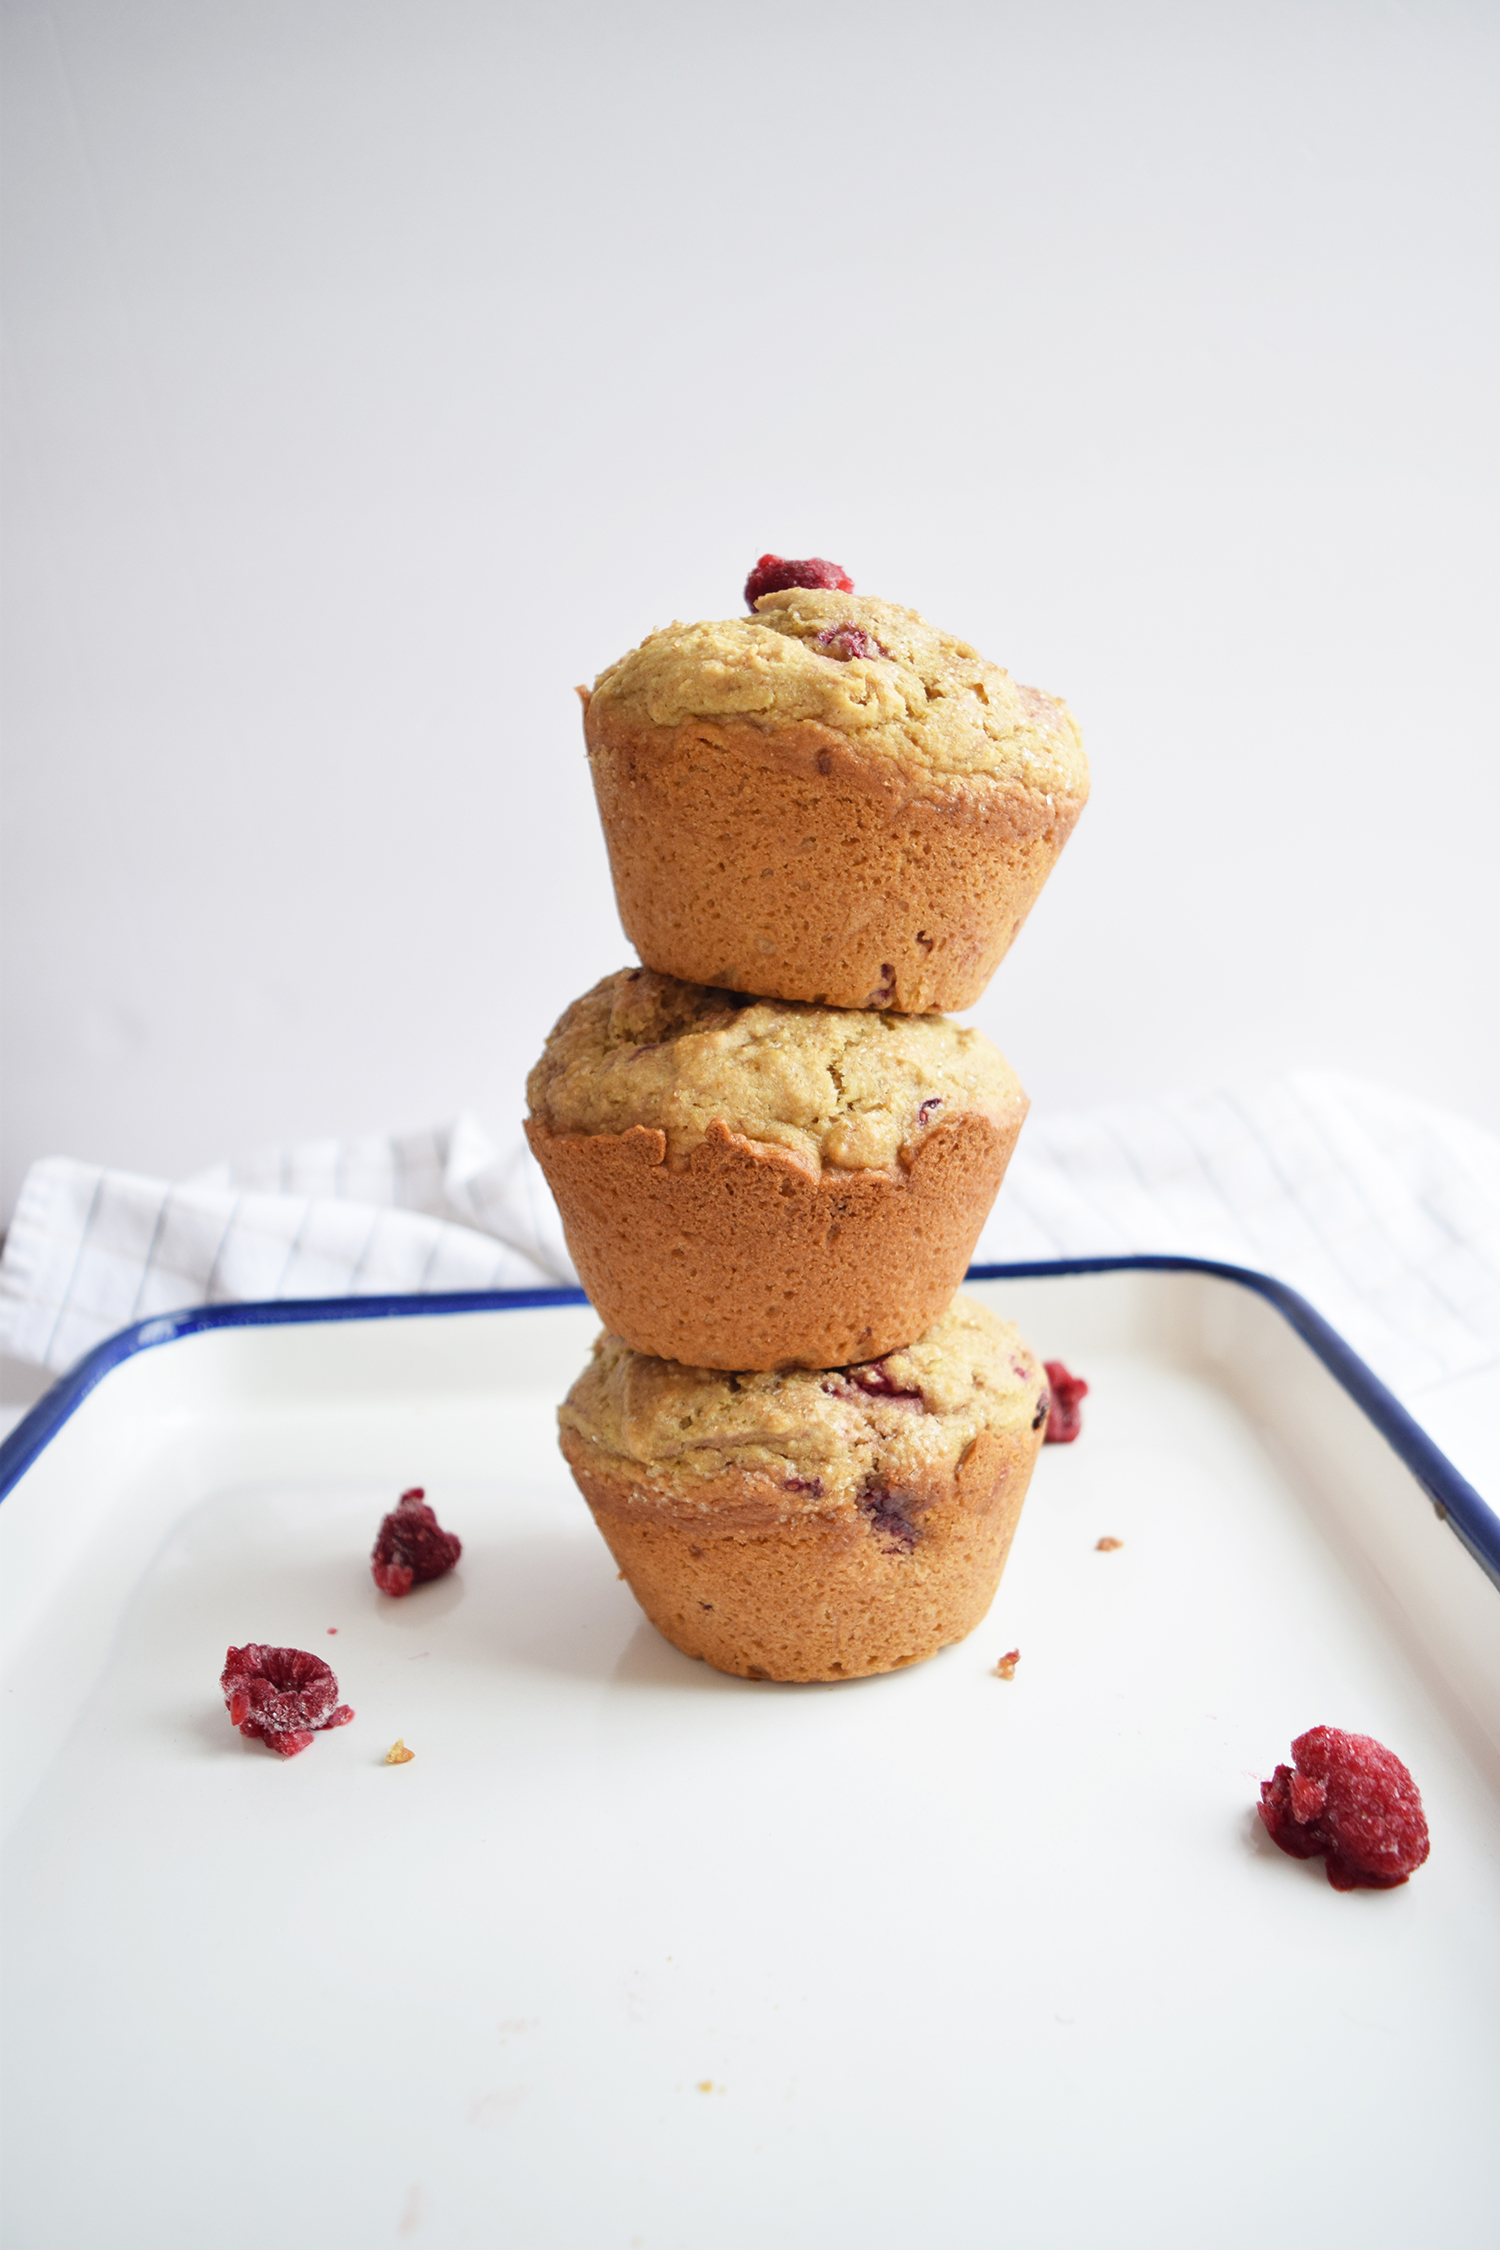
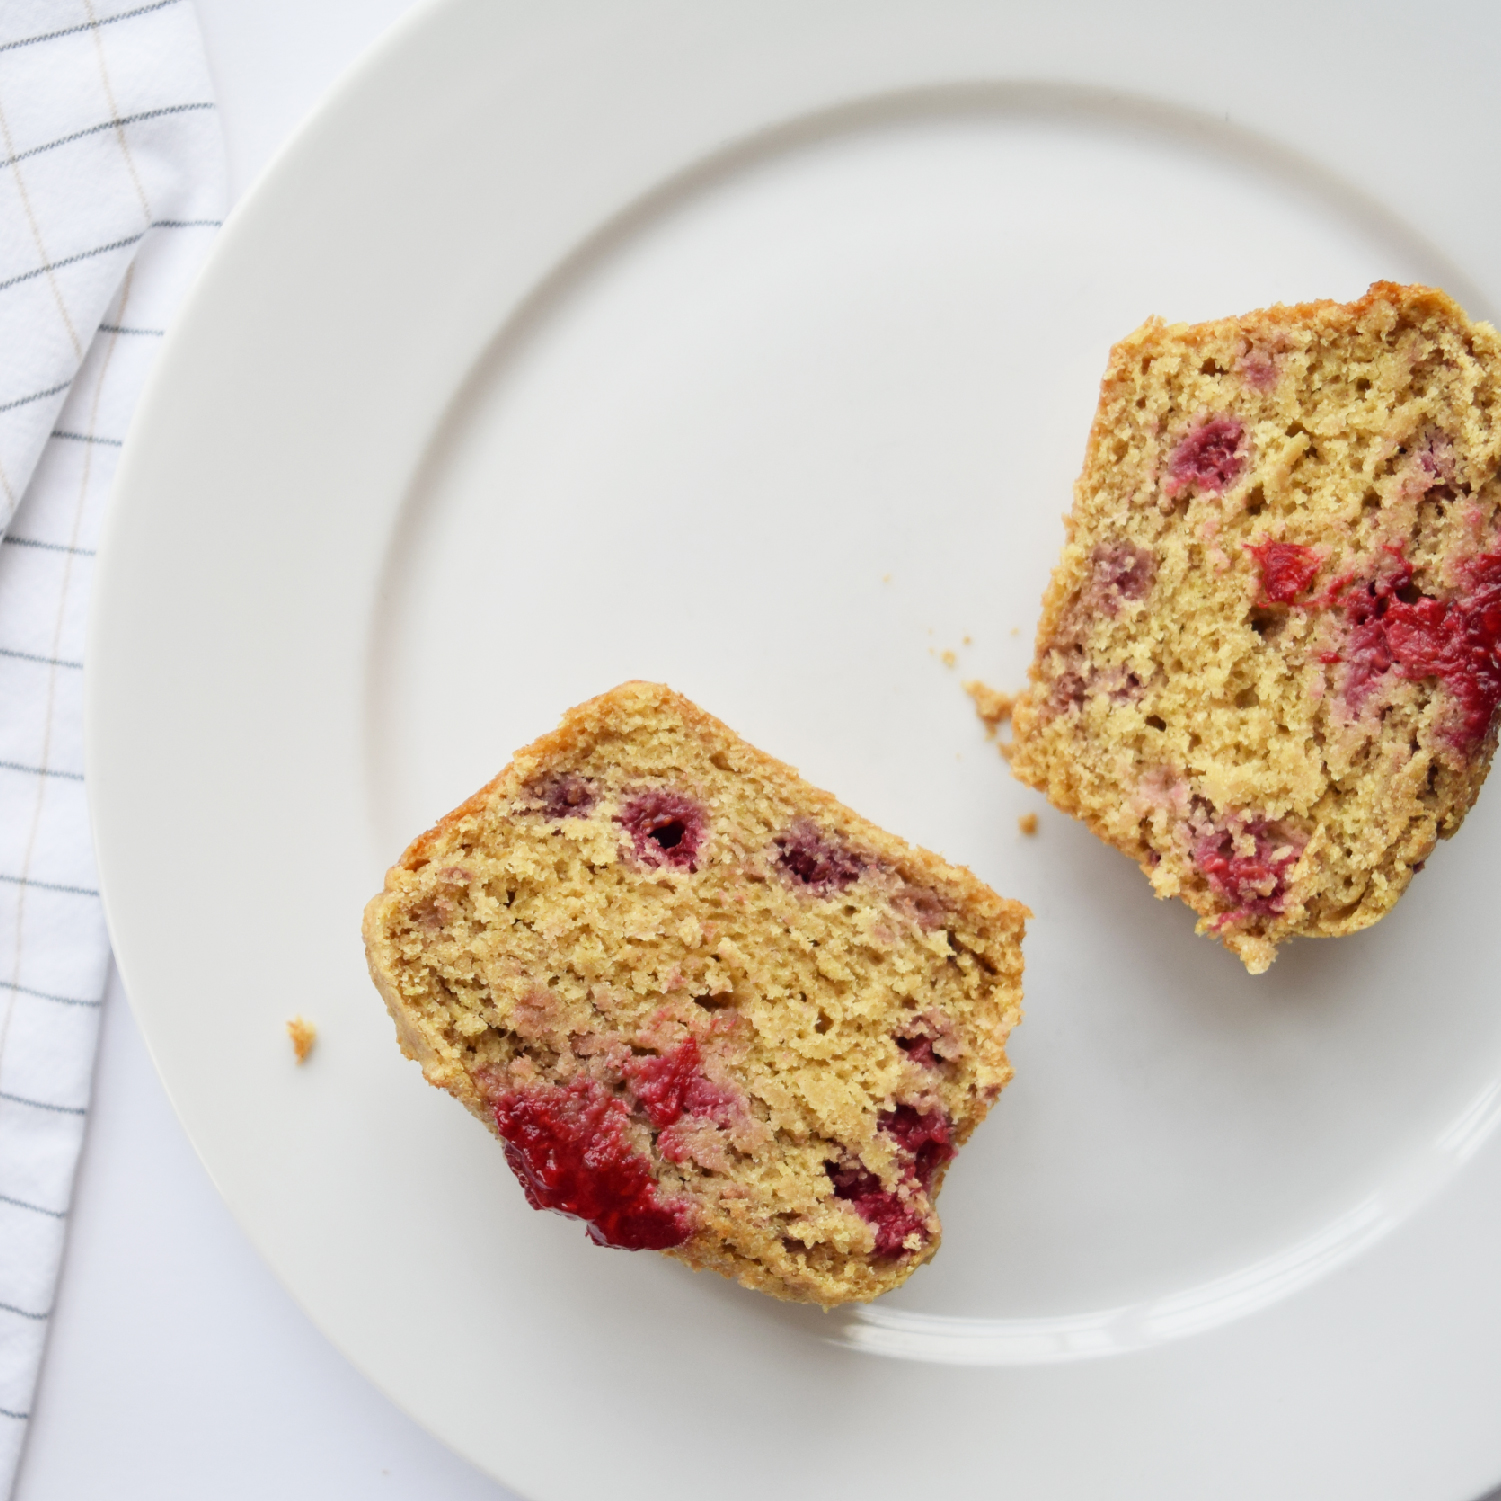
After researching rhubarb, we might find our stomachs rumbling for an easy rhubarb recipe. Slather this rhubarb spread on bread, layer it in a delicious dessert or just eat it spoonful by spoonful to celebrate this perfect time of year!

rhubarb_sauce_.jpg

Rhubarb Sauce

Ingredients:

  • 10 cups chopped rhubarb STALKS ONLY! (remove all green leaves from the stalks as the leaves are poisonous)

  • 3/4 - 1 cup unfiltered honey (add more or less honey depending sweet to tart ratio)

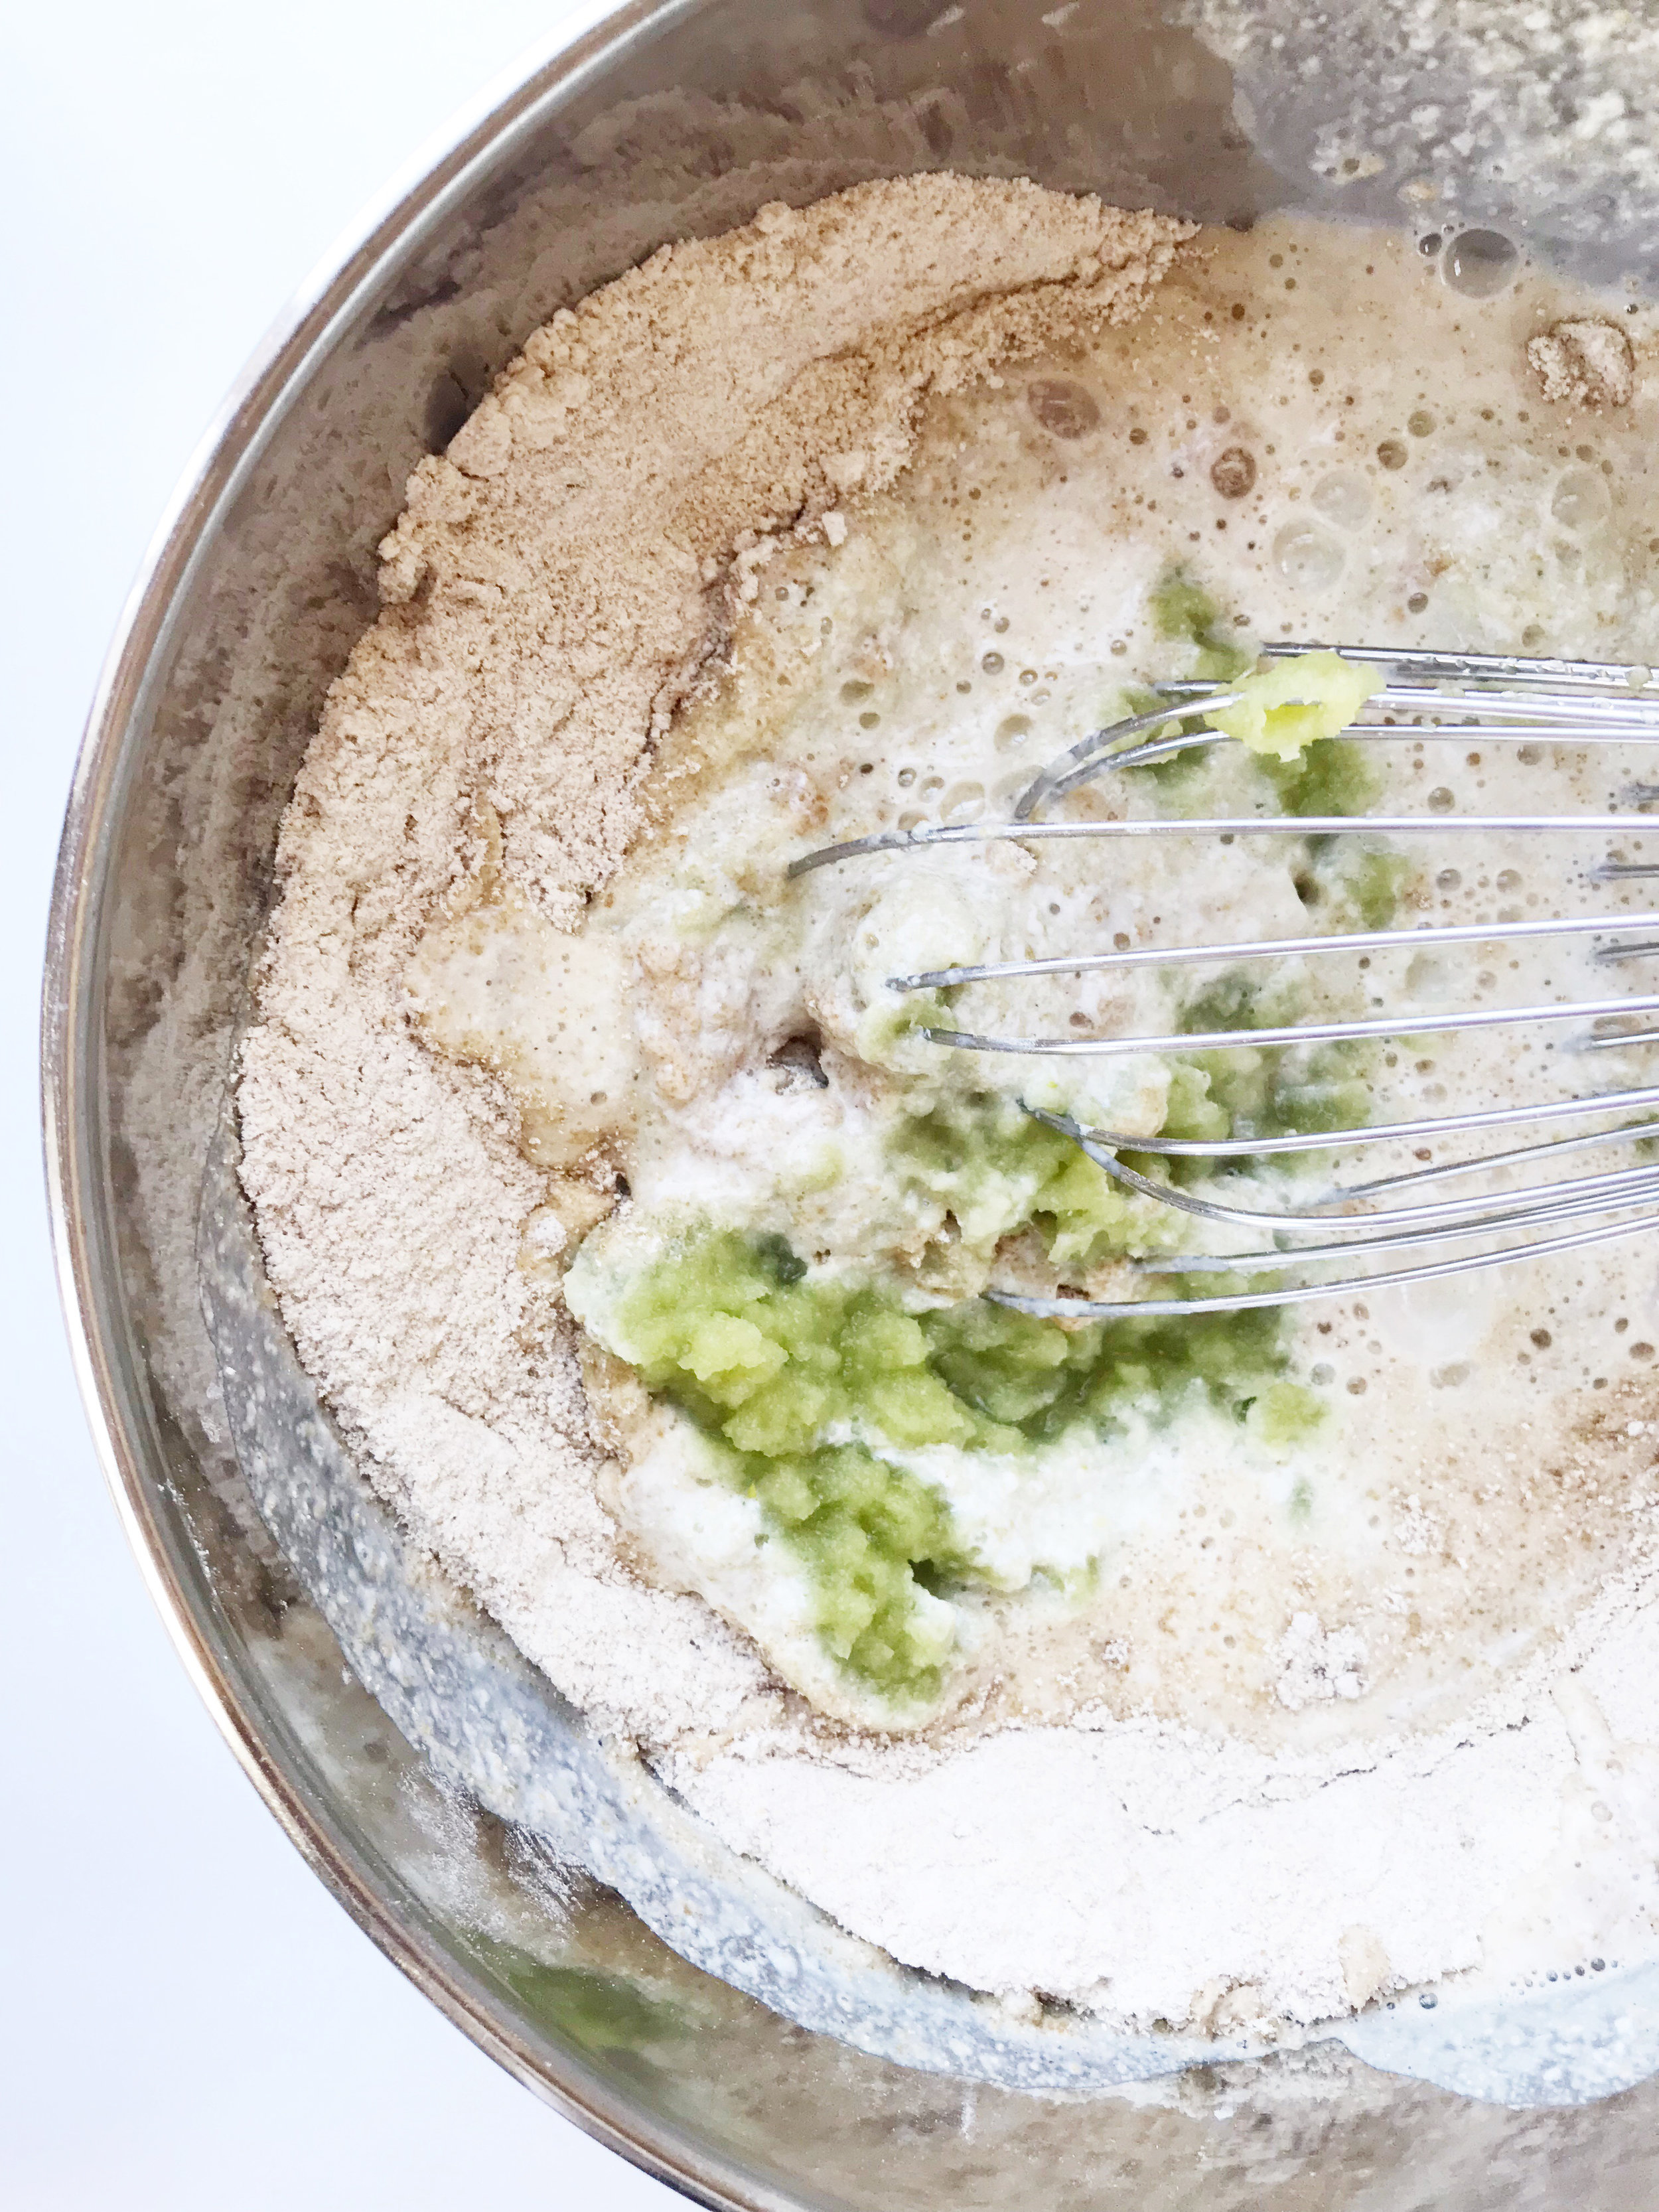
Step 1: In a large sauce pan, add the rhubarb and honey and turn the burner to medium-high heat. Let the mixture come to a boil and stir.

Step 2: Set and start a timer for 20 minutes. Let the mixture cook and stir frequently. When 5 minutes is left on the timer, carefully taste the mixture as the mixture will be hot. Add more honey if the mixture is too sour for liking. Continue to cook until the mixture is the consistency of pudding, about 5-10 minutes more.

Step 3: Let the rhubarb sauce cool. Place the sauce in an airtight container in the refrigerator for up to 1 week.

Slather, layer it, drop it on top of just about anything!

rhubarb_sauce_7.JPG
rhubarb_sauce_3.jpg

What an easy and delicious way to celebrate spring!

Until soon friends. //

Here Is How To Freshen Up Your Office For Spring.

This post contains affiliate links.

string_art_sq_2.jpg

// hello friends -

Spring has sprung! Our landscapes are coming alive with flowers blooming, little critters hatching and sunny days filled with glorious warm moments. Many of us may feel the impulse to do some spring cleaning or freshen up our home with a fresh coat of bright paint, a big flower bouquet or find just the right spot for a new plant. When I came across this DIY air plant string art project by ProFlowers, I couldn’t pass up the opportunity to create a modern decor piece for my office!

Air plant string art combines creative string art designs with air plant accents to create unique living art for your space. There are so many different styles that you can create with this concept, from bohemian to minimalist and everything in between. Check out these amazing design ideas from ProFlowers.

Image by ProFlowers

Image by ProFlowers

Image by ProFlowers

Image by ProFlowers

Image by ProFlowers

Image by ProFlowers

When I went to create my project, I kept it neutral. However, go ahead and feel inspired to paint the wood base with a bright coral or aqua for a fun pop of color on your wall. If you plan on painting your base, just give the surface time to dry before you start hammering the nails into the wood.

Let’s get started on this “DIY Air Plant String Art” by ProFlowers.

string_art_supplies.jpg
string_art.jpg

To create your own personal air plant string art follow the instructions laid out below or check out the comprehensive “DIY Air Plant String Art Tutorial” at ProFlowers.

Step 1: In pencil, mark where your nails will go with light markings on your wood.

Step 2: Hammer in the nails on a protected/covered work surface. Make sure to leave at least half an inch exposed above the wood so you’ll have room to tie and cut your string.

Step 3: Tie your string onto the nail at your starting point and make sure it’s tied tight.

Step 4: Wrap your string around different nails, loop them twice for a better hold.

Step 5: Tie the string and cut off any loose ends, make sure the string is pulled tight so the air plants will stay put on in the string.

Step 6: Place the air plants in your string design and make sure they’re secure.

Step 7: Enjoy! Display your art by propping it up or hanging it on a wall and just your air plants regularly to keep them fresh.

* When purchasing the wood base, consider the thickness of the wood and the length of the nails needed for your project. For example, a 1/4 inch thick base would be too thin for a 1-inch nail.

string_art_5.jpg
string_art_1.jpg


Isn’t it lovely to have a little a creative spring refresh in our office? If you want to keep creating check out my “Create Everyday: How To Unlock Your Creative Magic Now!” class on Skillshare. It’s a great way to keep creating everyday.

string_art_happy.jpg

Until, soon friends!

Here Is How To Make Valentine's Sew Happy!

This post contains affiliate links.

headband.gif

// Hello, Friends-

Valentine’s Day is just a few weeks away which means it’s a great time to create and collaborate!

Here is something I have realized about creativity.

Creativity comes from living, doing, and being together!

When creativity strikes, it’s a rumination of the the days events, a compilation of our senses, a blob of thoughts processed, a brewed set of ideas, and most importantly the randomness of people we encounter.

And it’s the randomness that keeps creativity alive.

That’s why kids are so amazing!

Kids are random.

And “sew creative.”

headband_sq_1.jpg

When my sweet little 7-year-old daughter popped into my office, started throwing around post ideas, I realized it was important to stop and listen. She really and I mean REALLY loves sewing. She came up with today’s project and together, we created beautiful, fabulous and stretchy headbands…

Together!

They are a perfect gift to give your Valentine or just a fun thing to sew.

Easy Headbands

Step 1: Layout the fabric on a flat surface and fold the fabric in half widthwise. Trim and remove the binding edge.

headband.jpg

Step 2: Fold the fabric in half widthwise again.

headbands_3.jpg

Step 3: Turn the fabric so the long side is facing you. Fold the fabric lengthwise 3-inches from the edge. (This will create at 2.5-inch headband with 1/4-inch seam allowance).

Step 4: Now cut the fabric along the fold.

headband_5.jpg

Step 5: On the end with the RAW FABRIC EDGE, cut a point in the end of the fabric. NOTE: DO NOT CUT THE END OF THE FABRIC WITH THE DOUBLE FOLD.

headband_8.jpg

Step 6: Clip the fabric together with the wrong side facing out and the pattern on the inside.

headbands_11.jpg

Step 7: With the sewing machine, start sewing at one of the points. Backstitch at the start of the sewing to ensure the stitches stay put. Leave a 2-inch opening on one side of the fabric.

headbands_14.jpg

Step 7: Use a kitchen skewer to turn the fabric right-side out.

Step 8: Sew the 2-inch opening closed by folding under each edge of the fabric to make a seam. Tie the two ends together and the headband is now ready for your Valentine!

headbands_1.jpg
headbands_8.jpg
headband_sq_2.jpg
headband_sq_4.jpg

Your Valentine is going to be “sew amazed” at your creative work! Now let’s stitch our way to the next project.

Until soon “sew cool” friends! //

Andra Weberyet, day, popular posts
You Are Going To Love This Healthy And Sweet Start To The Day!
celery_muffins_sq_5.jpg

Hello, Friends-

January is coming to a close and perhaps our New Year’s Resolutions are too. It’s hard to stick to our personal promises for an entire month, let alone an entire year. Once the month of January gets cooking, our resolutions can start to feel like cheap lies we negotiated to keep our December holiday high partying forward. Somewhere during the last week of 2018, between the second and third plate of holiday cookies and the forty eight hour Netflix binge watching marathon, we made pledges and oaths to ourselves that now seem downright absurd.

Like the very dark resolution I jotted down at the last day of 2018:

“Eat 5 more vegetables a day in 2019.”

The next day, I promptly stuffed my face full of chili lime corn chips. While I reassured myself that corn was indeed a vegetable, with personal reflection and some truth, I realized the goal of my resolution was simply to be more healthy. As desperate people do, I Googled the biggest health fad of 2019 and jumped enthusiastically on the “get me healthy no matter what the cost I don’t care what it tastes like” banwagon.

For the record, the health fad of 2019 is Juicing Celery.

Yes, Juicing Celery.

celery.jpg

Yes, the same good old green vegetable that is the forgotten child of any crudité platter is now the health darling of 2019. More can learned about the benefits of juicing celery here at The Chalkboard , “6 Surprising Health Benefits Of Juicing Celery.”

Yes, I did try juicing celery in my blender. Yes, the juice did taste something like lawn clippings, dirty rope and molted apple skin. It wasn’t bad. However, in my opinion the real goodness sits in the bottom of the juicer or the goop left after straining the liquid out of the blender; celery pulp.

What do we do with this blob of green celery stuff?

Throw it into a batch of whole wheat muffins and hope the muffins taste better than the celery juice. The verdict is these Celery & Fruit muffins were one of the moist, delicious and satisfying muffins ever tasted.

Don’t take my word for it, hop on the celery train and whip these simple healthy delights.


Celery & Fruit Muffins

Adapted from King Arthur Flour “100% Whole Wheat Blueberry Muffins” Recipe.

Ingredients

  • 2 1/2 cups Premium Whole Wheat Flour

  • 1 cup light brown sugar

  • 3/4 teaspoon salt

  • 1 teaspoon baking powder

  • 1/2 teaspoon baking soda

  • 1/2 teaspoon ground cinnamon

  • 1 teaspoon vanilla extract

  • 1/3 cup vegetable oil

  • 1 cups buttermilk

  • 3/4 cup celery pulp (what’s left after juicing fresh celery)

  • 1 cup frozen raspberries

  • 1 /4 cup Turbinado sugar

Step 1: Preheat the oven to 400°F. Grease the cups of a large muffin pan (6 muffins). (If using a 12 cup muffin pan see cooking time in Step 5.)

Step 2: In a large bowl, whisk together the flour, brown sugar, salt, baking powder, baking soda and cinnamon.

celery_muffins.jpg

Step 3: Add the vegetable oil, buttermilk, celery pulp and mix to combine.

Step 4: Fold in the raspberries into the batter and drop an even amount of batter into each muffin cup. Sprinkle each muffin cup with about a teaspoon of Turbinado sugar.

Step 5: Bake the muffins for 24-28 minutes, until a toothpick inserted into the middle of one of the center muffins comes out clean. (If using a 12 cup muffin pan bake the muffins for 18 - 22 minutes or until a toothpick comes out clean from the center of a muffin.)

Step 6: Remove the muffins from the oven, and let cool for 5 - 10 minutes and enjoy warm. Leftovers can wrapped and stored in the refrigerator for up to 3 days.


celery_muffins_10_1500.jpg
celery_muffins_sq_3.jpg
celery_muffins_sq_2.jpg

Enjoy the muffins and staring our day, our year in a sweet and healthy way!

Cheers to developing creative ways to keep our promises.

Until soon Friends!

Andra Webertoday, yet, popular posts
Here Is How To Get Kids Curious In the Kitchen.

Day 13 Of Finding Empathy.

Summer is just around the corner, and there might be a few parents out there looking to avoid the "I'm bored!" summertime slump. As adults, it's hard to have empathy for kids who whine and complain about having nothing to do! 

However, there is a new way to banish the "I'm bored!" phrase from your kids' summertime vocabulary while still firing up the brain synapses.

Without screentime.

Without spending a ton of money.

Without hours of material prep.

Without scouring the internet for activities.

If your kids love to tinker, try new things, and explore the "why" behind the "what," the STEAM Kids In the Kitchen book is the answer to keep kids engaged and learning all summer long!

It's filled with interesting activities and educational projects like:

Pizza Bubbles
Color Changing Lemonade
DIY Solar Oven
Strawberry DNA Extraction
Green Eggs and Ham
Kitchen Mini Makerspace
And so many more!!!

These projects will have kids:

question like a scientist,
design like a technologist
build like an engineer
create like an artist
deduce like a mathematician

– and, most importantly –

have fun in the kitchen!

There is both a print and ebook available to purchase here.

And until May 23rd with every STEAM Kids in the Kitchen purchase, a STEAM Kids In the Activity Placemat will be included for FREE!

Enjoy cooking up learning with STEAM Kids in the Kitchen and keep the boredom at bay all summer long.

Let me know how you like blowing cheese bubbles and catching sunlight with sun catcher cupcakes!

Until soon friends.

This Simple Dinner Will Make You Fall In Love.

This post contains an affiliate link.

cacio_e_pepe_sq.jpg

Day 27. Recipe 27.

It isn't often we fall in love hard for something. Every once in a while, however, a substance comes along that sweeps us off our feet. We find ourselves surrendering to the bliss that is brought on by this thing that suddenly gives our lives pizazz and meaning.

And it's always the simple things where we find love.

Cacio e Pepe is no exception. 

Deeply salted noodles caressed in Pecorino Romano cheese is the taste of divinity. 

My husband unknowingly requested we buy red sauce "Just in case the kids wouldn't eat the plain noodles."

Oh, how he ate his words as the entire family sat together quietly filling our bellies to the brim with Cacio e Pepe.

Everyone fell in love hard with this recipe.


Cacio e Pepe 

(adapted from Tales Of Ambrosia)

Step 1: Bring a tall pot of water to a boil with the sea salt. Add the pasta and cook according to the package directions.

Step 2: 3 minutes before the pasta is done, place a large microwavable serving bowl in the microwave and heat for approximately 1-2 minutes until warm. Remove from microwave and set next to the stove.

Step 3: When the pasta is done, using a ladle place 1-2 scoops of salted water from the pasta in the warmed bowl. Add half the cheese and let melt. Drain the pasta and add it to the heated bowl stirring with the salted cheese mixture. Add the remaining cheese if the pasta is too wet. Top with black pepper to taste, add any remaining cheese. Serve immediately and enjoy!


cacio_e_pepe.jpg

Who thinks this is love on a fork?

Until tomorrow friends!

Why A Muffin Top Is The Best Thing About Monday.
muffin_top_sq_2.jpg

Day 26. Recipe 26.

We all want to make today better. However, it's hard to get on top when we don't fuel up with the right stuff to start our week. Sure, the cereal loaded with sugar is easy to grab, and the hot bowl of oatmeal will take too long to make us feel good, so we end up skipping the most important meal of the day.

We just walk in the week hungry, and that isn't right.

To sprint into the week, what should we eat?

A delicious, crispy, golden muffin top of course!

Bake them the night before and we can head out into our day in a jiffy.


Oaty Cherry Muffin Tops

  • 2 cups old-fashioned rolled oats 
  • 1 1/2 teaspoons baking powder
  • 3/4 teaspoons baking soda
  • 1/8 teaspoon salt
  • 1/3 cup agave syrup or honey
  • 1/4 cup greek yogurt
  • 1/4 cup sunflower oil
  • 1 teaspoon vanilla extract
  • 2 eggs at room temperature
  • 12 teaspoons cherry preserves
muffin_top_sq_3.jpg

Step 1: Preheat an oven to 350 degrees and spray a standard size muffin tin with cooking spray. Make the oat flour by placing the rolled oats into a blender and pulse until finely ground.

Step 2: In a large bowl, add the oat flour, baking powder, baking soda, and salt. Stir to combine.

Step 3: In a medium bowl, syrup or honey, yogurt, oil, and vanilla extract and stir to combine. Add the eggs one at a time and mix. Add the wet ingredients to the dry ingredients. Mix until smooth. 

Step 4: Fill each muffin cup 1/2 full with batter. Top with approximately 1 teaspoon cherry preserves. Bake for about 20 minutes or until a toothpick inserted into the center comes out clean.


muffin_top_3.jpg

May this recipe make you the top muffin this week!

Until tomorrow friends.

Here Is How To Be More Creative Day 5.

Some people will tell us that certain people are born creative. These individuals came out of the womb instantly coming up with well defined and successful ideas from the very beginning of their lives. Picasso picked up a paint brush and whipped up "The Old Guitarist" in a flash. Richard Branson developed his first business, and it was an overnight success. Steve Martin hopped on stage and got people laughing on his first try. The Dali Lama just knew how to lead people right into a compassionate existence. Right?

Yeah. No.

When we meet someone who is infinitely creative and successful, there is a secret they hold. These creative leaders worked their tail feathers off every day. They doodled, refined, wrote, sketched, refined their work over and over and over again. 

When it didn't work, they tried again. 

And again.

They had doubts and they wanted to give up but they didn't. The most important thing they did was sit down and work out ideas.

The ideas will be bad. 

There will be failures.

But they did the work anyway.

One day they create something that changes the world around them, shifts perspectives and redefines something bigger. That's creativity at work.

An Illustration Sketch. Next Step Refine and Define!

An Illustration Sketch. Next Step Refine and Define!

This One Was Sketched, Refined and Defined 4 times. It still needs work.

This One Was Sketched, Refined and Defined 4 times. It still needs work.

Until tomorrow Creative Friends.


Why Be An Alligator Pear When You Can Be An Avocado?

Finding our identity in this world is hard. We try to fit in, we try to stand out, and we try to make our mark. We offer the best intentions, the best product or the best service. We market ourselves on social media and put the goods in front of eyeballs in hope the world to take part. We can work harder than anyone else and make concrete strides needed to succeed. We can do everything in our power to make success blossom in our purpose.

However, if things aren't fruiting up to our expectations, we may have to stand back, reevaluate and decide we need to be an avocado.

Yes, an avocado. 

The word avocado is a wholly invented word. As the story goes, the avocado was introduced to the United States market around 1914, and it was called an alligator pear. Who wants to eat an alligator pear? I am positive there are a few of you out there that share in my personal revulsion regarding the name alligator pear. As the story goes, a group of brilliant farmers realized the distaste in the name and the marketing problem. They together formed a solution. They made up the name avocado. More can be read on NPR "What's In A Name The Avocado Story."

The teachable moment here is sometimes a problem isn't how hard we work, what channel we push or how to differentiate our offering. Sometimes we need to reframe and rename.

By reframing the problem, a label can bring us to a whole new story. In turn, an entirely new success can follow. 

The avocado market now is a billion dollar industry.

I'm off to reframe and rename. What will you reframe today and rename today?

Until tomorrow.

Week 2 - Why It's Important To Be Bold And Be Yourself.

It's easy to get in the habit of being someone else. It's simple to watch and mimic a life that isn't our own. It's hard to do the thing that makes us, well, us. Take the fact that I Iove the color pink. Yes, the pink. As a well-educated, worldly woman, I am not allowed to like pink. Everyone knows pink is a color that strictly for princesses, lipstick and people who aren't taken seriously. For all the talk that women should be allowed to be anything they want, pink and princess feel like they are nonstarters in the future being female.

Why can't we like pink, princesses or anything we want and still be a powerful senator or CEO? More importantly, whether you are female or male, why can't we just be ourselves? 

It's all rubbish. I'm going to throw on a bold shade of lipstick and parade around today. How about you? What will you do today to be yourself? Being bold is being ourselves. Own that shade today.

Until tomorrow.